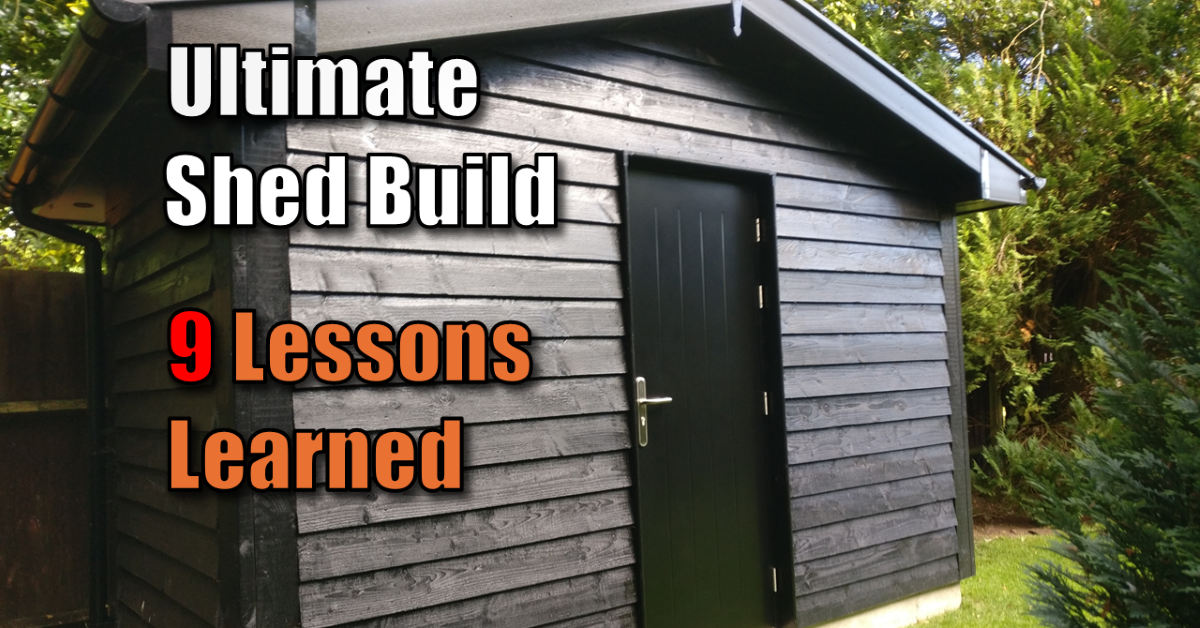
9 Hard Lessons I Learned When You Build a DIY Shed
Every build a DIY shed video on the internet makes building a backyard structure look like a casual, 48-hour weekend project. A couple of quick time-lapses, some upbeat royalty-free music, and boom—a perfect building appears out of nowhere.
But if you are standing in your backyard looking at a patch of raw dirt, you know the reality is a lot more stressful.
You’re staring at a list of high-anxiety questions: What if my concrete slab cracks? Am I wasting hundreds of dollars on lumber cuts? How do I securely anchor this thing so a heavy storm doesn’t rip it off the foundation? What roof design should I adopt? How do I run power to the shed?
And if you’re building a workshop to house expensive tools, networking gear, or automation tech, standard “flimsy tool shed” tutorials aren’t going to cut it. You need structural-grade engineering and tight security.
I recently built the ultimate heavy-duty smart shed completely from scratch. I dealt with the rain, delays, the stubborn tree stumps, the math headaches, and more. Along the way, I learned exactly where the hidden traps are—the mistakes that will cost you time, ruin your materials, and threaten the structural integrity of your building.
Whether you’re building a simple storage shed, a backyard office, or a high-tech workshop, these 8 hard-earned lessons will save your budget, your tools, and your sanity when you build a DIY shed.
Want to see the actual sweat and dust?
I logged every single phase of this build chronologically on camera. If you prefer a visual walkthrough alongside this guide, you can click here to binge the full Smart Shed Build Series on YouTube and watch the entire process unfold.
▶ Watch The Complete Shed Build SeriesLesson 1: Don’t Underestimate What’s Underground
A level foundation requires an immaculate clearing. Skipping or rushing through clearing obstructions will ruin the entire project down the line. When you are prepping your site, what looks like a small ground-level obstacle can often turn out to be a structural nightmare that threatens to throw off your entire excavation line.
- The Reality: If you leave organic material like rotting roots or stumps beneath your build site, the ground will settle unevenly over the next few years. That movement can shift your foundation, warp your framing, and crack your seals.
- The Solution: Spend the extra time to completely clear the footprint. I spent hours dealing with a deep-set tree stump. You can see the exact rigging and physical setup I used to pop it out of the ground safely in Episode 2 of the build series here.

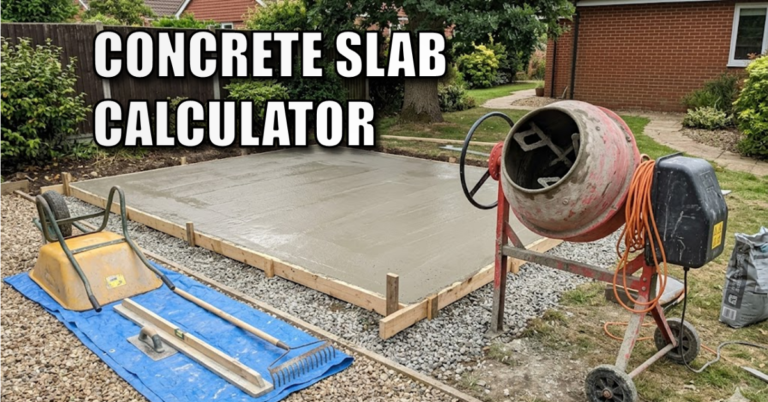
Lesson 2: Concrete Is a High-Anxiety Game
Pouring a solid concrete slab is one of the most stressful phases for any DIYer. Why? Because unlike wood or metal, once concrete is poured and starts to cure, you cannot undo a mistake. If your working in the summer the concrete cures more quickly.
- The Reality: You have a very limited, strict window of time before that truck or mixer finishes its chemical reaction and sets. If your perimeter forms aren’t perfectly square, heavily braced, and level, the weight of the wet concrete will bow the wood, leaving you with a warped, un-square base that ruins your wall framing alignment. Building on a sloppy made or uneven concrete base will end up causing structural damage shed, moisture infiltration and doors that won’t close properly. A solid, level foundation for your shed is non-negotiable.
- The Solution: Double-brace your forms and have your screed boards ready before the first drop of mix hits the ground. If you want to see how to avoid a total disaster while screeding, leveling, and finishing a DIY slab, I walked through my exact pouring process in Episode 3.

Lesson 3: Plan Your Dimensions to Build a DIY Shed Without Lumber Waste
Most novice builders pick an arbitrary size for their shed—like 9ft by 11ft—without realizing they have just signed up for an absolute nightmare of cutting, measuring, and wasted money and materials.
- The Reality: If you build a shed with random, custom dimensions, you will spend half your project measuring, sawing, and throwing expensive scraps into the trash.
- The Solution: Utilize modular sizing. Because sheet goods like structural OSB, plywood, and siding are manufactured in standard 4ft x 8ft panels, you should size your walls, floor, and roof layout in multiples of 2 or 4 feet (such as 6×12, 8×12, 12×12, or 12×16). Designing this way means your exterior sheathing panels line up perfectly with your wall studs without needing to trim down every single sheet. I intentionally planned the layout of my smart shed around these standard dimensions. Check out Episode 7 to see how a little bit of planning on paper saves you hundreds of dollars in lumber and hours of cutting.

Lesson 4: Frame for Security, Not Just Storage
Standard store-bought sheds use flimsy, thin wall panels that a thief could practically cut through with a hand saw. If you are housing valuable tools you have to upgrade your framing mentality.
- The Reality: A building is only as strong as its sheathing and stud connections. Standard framing might handle vertical weight, but it lacks “racking resistance”—the structural strength that keeps the building from twisting or collapsing sideways under immense lateral pressure or forced entry attempts.
- The Solution: Upgrade to thick, structural-grade OSB sheathing and use a proper 16-inch on-center stud layout. Use 4×2 framing wood. I break down the entire heavy-duty framing and sheathing strategy in Episode 7, showing how I engineered the outer walls to act as a security barrier for the tech inside. I also made sure to have double uprights around the door frame as well as a double top plate for additional strength as well as to support a steel security door. Unless you are an experienced carpenter, I would advise to avoid building a shed door from scratch. DIY doors tend to warp and sag over time, leading to frustrating alignment issues. If you can invest ina pre-made security door. You can see a detailed install video of the security door below.

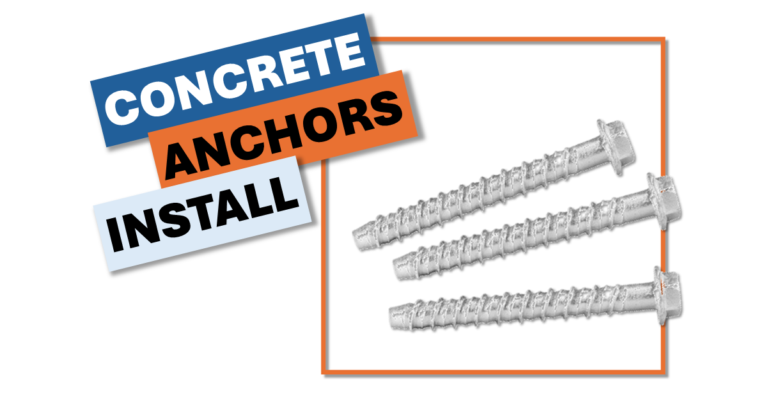
Lesson 5: The Concrete Anchor Mistake That Ruins Sills
Once your walls are built, you have to connect the wood sill plates directly to your concrete slab. A lot of people treat this as an afterthought, guessing where to place their fasteners or rushing through the drilling process.
- The Reality: If you drill too close to the outer edge of your cured concrete slab, the pressure from the expanding anchor will blow out the side of the concrete, permanently ruining that section of your foundation. Furthermore, choosing the wrong fastener can lead to loose walls over time.
- The Solution: Understand the mechanical differences between your options. For this heavy-duty build, choosing between wedge bolts and sleeve anchors came down to exact load tolerances and edge distances. I went through the precise drilling, depth-marking, and dust-clearing process to securely lock the wood frame to the slab in Episode 8—make sure to watch this step so your building stays permanently anchored using anchor bolts.

Lesson 6: Plan for Cable Routing Before the Walls Go Up
Standard sheds are just wood boxes meant to hold a lawnmower, but a modern smart workshop needs power, data lines, main power conduits, sensor wiring, and security feeds.
- The Reality: Its important to plan this out ahead of time. Think about where you want your consumer unit, lighting, power sockets, camera feeds etc before you start the shed build.
- The Solution: Think where you want everything from overhead lighting, to sockets an switches to camera feeds and sensors. I ran a conduit underneath the slab that emerges in a corner of the shed. I’m going to use that to feed in mains power and an ethernet cable for secure connectivity. If you watch the beginning of the the slab build episode you can see the conduit run, including depth required for electric cables and safety marker tape. Fast forward to running the conduit in Episode 3.
Lesson 7: The “Squareness” Paradox
In DIY construction, a tiny error at the bottom of your build doesn’t stay tiny. It multiplies exponentially as you build upward.
- The Reality: If your foundation or bottom wall plates are even a quarter-inch out of square, you might not notice it while standing on the ground. But by the time you build up to the top plates and try to install your roof trusses and rafters, that tiny quarter-inch error will stretch into a massive, multi-inch gap. This leaves you with uneven overhangs, warped roofing, and structural gaps that invite leaks.
- The Solution: You must double-check your diagonal measurements across every single phase—from the initial concrete forms to the final wall headers. If the two diagonal corners measure exactly equal, you are square. I checked my diagonals when making the form for the concrete slab. I also checked diagonals for each wall frame and then again when fixing all four walls together. It paid off when building the roof meaning all of the joists could be cut from the same template and no need to chase errors.
Lesson 8: Weatherproofing & Ventilation Is a Security Feature
When most people think of home security, they think of deadbolts and cameras. But if you are building a shed for the long haul, moisture is a far more dangerous threat than any intruder.
- The Reality: High humidity, slow condensation drips, and wind-driven rain will quietly destroy your shed timbers reducing its lifespan and wasting your hard work and money.
- The Solution: Your moisture barriers and structural joints must be absolutely continuous and immaculate. Make sure you put a damp course below the wall sill plate to prevent contact with the concrete slab. Wrap the walls and roof deck in breathable membrane, and make sure you have adequate ventilation behind the outer wall cladding. Sheds can become incredibly hot and humid – especially in the summer months. Without adequate airflow, moisture will get trapped, build up and quickly lead to mould and wood rot. Always include ventilation options like soffit vents and roof cavities to keep the structure breathing. Finish off with a high quality wood stain and preserver to keep the rain out.
Lesson 9: Don’t be Cheap on the Roof
Don’t be afraid to spend money on a high quality roof design. Your choice of roof design and materials will heavily impact how long your shed will last.
- The Reality: A badly designed roof will allow water in causing premature rot reducing its lifespan and wasting your hard work and money. Opting for cheap materials is a shortcut you should avoid. Rainwater and snow will easily find weaknesses in a sub standard roof.
- The Solution: Invest in heavy-duty timbers for your roof joists, sturdy roof sheeting, quality tiles, and ensure your roof pitch is steep enough to allow water and snow to run off efficiently. Take a peak at episode 10 for laying quality roof tiles, a dry verge and ridge system.

Summary: Sweat Equity Pays Off
Building a high quality shed entirely by hand is a big undertaking that will push your physical and mental limits. But by avoiding arbitrary dimensions, over-engineering your security framing, and paying obsessive attention to keeping your layout square, you will end up with a backyard workspace that rivals commercial construction.
Want to see the actual sweat and dust?
I logged every single phase of this build chronologically on camera. If you prefer a visual walkthrough alongside this guide, you can click here to binge the full Smart Shed Build Series on YouTube and watch the entire process unfold.
▶ Watch The Complete Shed Build SeriesThe Build a DIY Shed Series
- How to Tile a Roof with Slate, Install a Dry Verge & Fit a Dry Ridge | ULTIMATE Smart Shed (Part 10)
- Framing a Shed Roof, Making Birdsmouth Cuts & OSB Decking | ULTIMATE Smart Shed (Part 9)
- How to Anchor a Shed to a Concrete Slab: The Ultimate Shed Build Part 8
- Shed Framing & Structural OSB Sheathing | ULTIMATE Smart Shed (Part 7)
- Building the ULTIMATE Smart Shed (Part 6 – Framing the Front Wall)
- How to Frame Shed Side Walls: The Ultimate Smart Shed (Part 5)
- Shed Framing 101: How to Build a Strong Rear Wall (Smart Shed Part 4)
- Building the Ultimate Smart Shed (Part 3): How to Build a Concrete Shed Foundation
- How to Remove a Tree Stump the Easy Way: No Digging Required!
- How to Install Concrete Anchor Bolts (The Best Way to Secure a Shed)
- Building the Ultimate Smart Shed (Part 1): Plans & Site Preparation
- Introducing The Ultimate Smart Shed Build: Why We’re Building a High-Security, Tech-Integrated DIY Shed
Subscribe Now!
If you found these build a DIY shed lessons learned interesting and are ready to stop guessing and start troubleshooting your own tech plus smart DIY, head over to the Built By Pete YouTube channel! We’ve got hundreds of other DIY projects and smart home tutorials. Click here to subscribe to the BuiltByPete youtube channel and hit the notification bell so you never miss out on the tips, tricks, and step-by-step guides that will simplify your tech life.