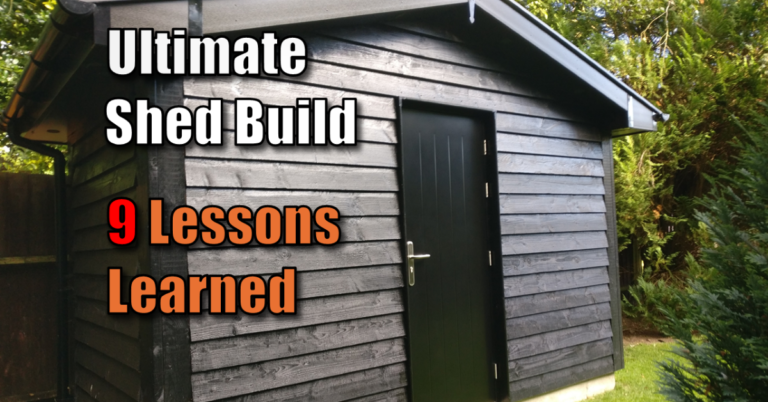
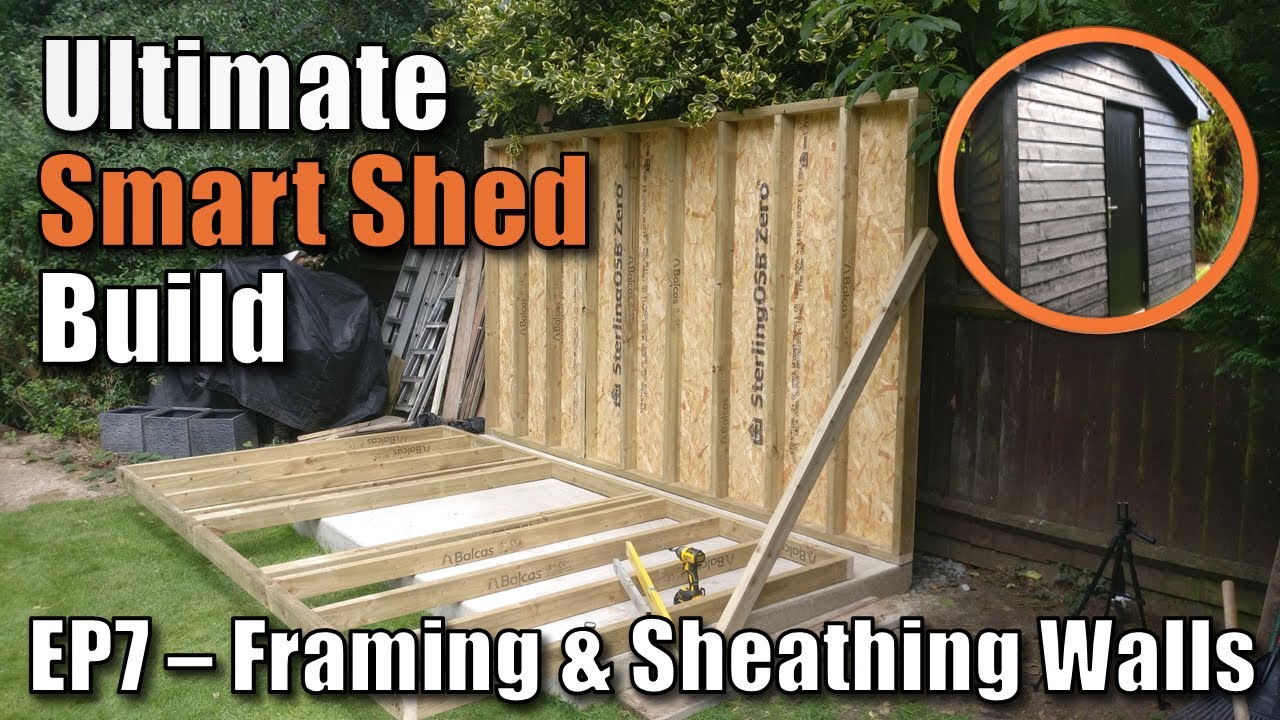
Shed Framing & Structural OSB Sheathing | ULTIMATE Smart Shed (Part 7)
One of the biggest challenges in building the Ultimate Smart Shed was handling the wall framing and sheathing entirely on my own. When you’re working without a second pair of hands, you have to work smarter, not harder.
In this guide, I’ll show you the “flat-pack” method I used to ensure my walls were perfectly square before they ever left the ground. This makes shed framing accurate and easier to lift on your own.
Watch the Full Shed Framing Build Video
See the Shed Framing, “Solo Wall Rotation” and the OSB trimming in action in Part 7 of the series:
1. Material Selection: The “Smart” Choice
For this shed build, I opted for C16 Grade 4×2 (47mm x 95mm) Timber. While C24 is often cited in heavy construction, C16 is the “Smarter” choice for a residential shed—it offers excellent structural integrity at a better price point, especially when paired with 16-inch centers and a double top plate for the walls.
The Heavy-Duty Spine
The one area where I “over-specced” for strength was the Ridge Plate (which is for a future episode in the build series where I tackle the roof). For this I used a 4×6 (47mm x 150mm) beam. This provides a massive surface area for the rafters to bite into, which is essential for the 20-degree pitch and the weight of the slate tiles coming in the next phase.
Key Materials Used:
- Timber: 4×2 C16 Treated Softwood
- Sheathing: 12mm Structural OSB3
- Fasteners: 4.5 x 50mm Spectre Screws
- Protection: 100mm Damp Proof Course (DPC)
| Component | Size (mm) | Grade | Purpose |
| Wall Studs | 47 x 95 (4×2) | C16 | Vertical Load Support |
| Ridge Plate | 47 x 150 (4×6) | C16/C24 | Heavy-Duty Roof Spine |
| Roof Rafters | 47 x 95 (4×2) | C16 | 20° Pitch Support |
| Sheathing | 12mm OSB3 | Structural | Waterproofing & Rigidity |
3. Why I Choose Spectre Screws
I’m not sponsored, but for this build, I used Spectre 50mm x 4.5mm screws . They have “saw teeth” on the tip that cut their own path, preventing the wood from splitting—a lifesaver when you’re trying to hold a heavy board with one hand and a drill in the other. They can also be removed easily if you need to.
4. The “Square First” Secret: Sheathing on the Slab

Most people try to put their OSB sheathing on after the walls are stood up. If you’re working solo, that’s a nightmare – especially for larger shed’s. I opted to install the OSB sheets on the front and rear walls, leaving only the two side walls being much smaller to install in place.
The Pro Move: Lay your frame flat on the concrete slab. The concrete slab provides a large clean and level platform for working. Because OSB sheets are engineered to be perfectly square, you can use them as a “jig.”
- Align the bottom and side edges of your first 12mm OSB sheet with the frame.
- Check your diagonals. (I managed to get mine within a 2mm difference!)
- Screw it down using 50mm Spectre screws (no pilot holes needed!).

Once you’ve got your first OSB sheet in place and screwed down, its just a matter of placing the remaining sheets sheets adjacent to the previous ones and screw down and trim any excess as necessary. Be generous with the screw fixings. Anywhere between 150mm and 300mm spacing to ensure a good solid fixture. Remember, OSB is structural and adds to the overall strength and rigidity of the shed.
Pro Tip. After you have screwed the OSB around the perimeter, use a string line, to mark a line along the centers of the studs, so you can screw the OSB sheet down with confidence of hitting a stud hidden behind the OSB.

5. Preparing for the “Lift”
Before you stand the walls up, there are two crucial steps you can’t skip:
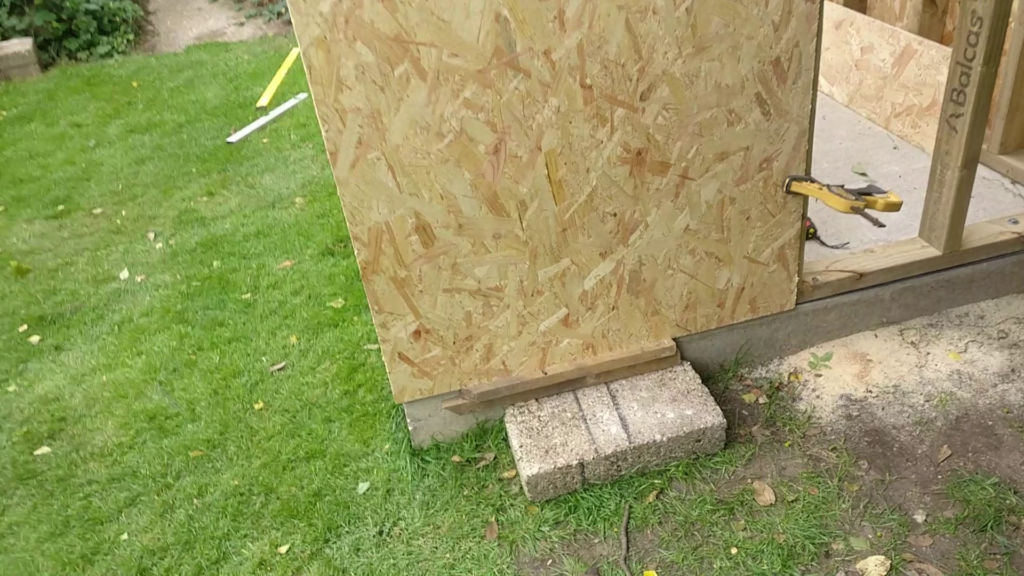
- The Chalk Line: Use a string chalk line across the top to trim the OSB flush with your top plate.
- Damp Proof Course (DPC): Staple a 100mm wide DPC membrane to the bottom of your sole plate. This stops moisture from the concrete wicking up into your timber.
6. Standing the Walls (The Solo Strategy)

To do this safely alone, I used a simple bracing system:
- The Rear Wall: Lift this first and use a temporary 4×2 brace screwed into a heavy scaffold board or weighted with concrete slabs.
- The Side Walls: Once the back is up, move to the sides. Use Quick-Grips to hold the corners together while you check for level and square.
- The Front Wall: hen with the rear and side walls in place you can lift the front wall into place using the brace method. If everything is square it will align with the two side walls all ready and waiting.
- The Final Connection: Use heavy-duty 100mm x 6mm bolts to pull the uprights together in every corner.
With the two man walls already squared in place with the OSB pre-attached, moving the side walls to make sure the overall shed is square and upright with even diagonals should be a breeze. If you focus on getting everything dimensionally accurate and square in the phases of the built, you reap the benefit during assembly.
7. Attaching the Side OSB Sheathing
With the four walls standing, sheathing the remaining end walls becomes easier and more straightforward. I used some packing on the floor that both aligns the bottom of the OSB sheets correctly and supports the weight of the OSB sheets. Then holding them in place with some quick grips you are both hands free to fix the final OSB sheets in place with the 50mm screws.
8. What’s Next

With the shed framing and OSB sheathing completed for the four walls, what’s next. We’ll in the next part of the build series we’ll be fixing the shed frame to the concrete base, for continuing with the shed framing, but this time it will be the pitched roof.
Frequently Asked Questions: Shed Framing & Sheathing
Q: Why use C16 timber instead of C24 for shed framing?
A: While C24 is stronger and has fewer knots, C16 is the industry standard for residential garden buildings in the UK. When you are shed framing at 16-inch (400mm) centers, C16 provides more than enough structural integrity for a “Smart Shed” while keeping the project budget-friendly.
Q: Can I skip the DPC (Damp Proof Course) if my slab is treated?
A: No. Even a treated or sealed concrete slab can hold moisture. Placing a 100mm DPC between the concrete and your timber sole plate is a critical barrier that prevents “rising damp,” which is the #1 cause of rot in timber sheds.
Q: Do I really need structural OSB3, or is standard OSB2 okay?
A: For any external sheathing, you must use OSB3. OSB2 is designed for dry, internal conditions (like furniture or interior walls). OSB3 is engineered to handle humid and damp environments, making it the only choice for a shed that needs to last 15+ years.
Q: Is it safe to lift a sheeted wall alone?
A: It is safe only if you use a mechanical pivot (like a kick-block screwed to the slab) and have pre-cut braces ready to catch the weight. Never attempt a solo lift in wind speeds over 10mph, as a sheathed wall acts like a sail and can be easily caught by a gust.
Q: Why didn’t you use noggins in the wall frame?
A: Because we installed Structural OSB Sheathing while the wall was flat on the slab. The OSB acts as a “skin” that provides far more lateral rigidity (rack resistance) than individual noggins ever could. This also keeps the wall cavities clear for cleaner insulation and cable runs later.
Q: How many screws should I use for the OSB sheathing?
A: For a structural finish, I recommend spacing your 50mm Spectre screws every 150mm along the edges of the sheet and every 300mm along the internal studs. This creates a “monocoque” structure that is incredibly rigid.
Further Reading
Catch up on other episodes of the shed build:
- Introducing The Ultimate Smart Shed Build: Why We’re Building a High-Security, Tech-Integrated DIY Shed
- Building the Ultimate Smart Shed (Part 1): Plans & Site Preparation
- Building the Ultimate Smart Shed (Part 3): How to Build a Concrete Shed Foundation
Subscribe Now!
If you found this shed framing guide interesting and are ready to stop guessing and start troubleshooting your own tech plus smart DIY, head over to the Built By Pete YouTube channel! We’ve got hundreds of other DIY projects and smart home tutorials. Click here to subscribe to the BuiltByPete youtube channel and hit the notification bell so you never miss out on the tips, tricks, and step-by-step guides that will simplify your tech life.