How to Anchor a Shed to a Concrete Slab: The Ultimate Shed Build Part 8
How to anchor a shed to a concrete slab. In Part 7 of the shed Build, we got the framing square and level. Now, it’s time to make it permanent. If you’re building a high-tech workshop or a “Smart Shed,” you cannot skip the anchoring process.
In this guide, I’m showing you the exact method I used to fix my shed wall base plates into the concrete foundation using heavy-duty concrete anchor bolts.
Watch the Build: Anchoring the Shed Base Plates
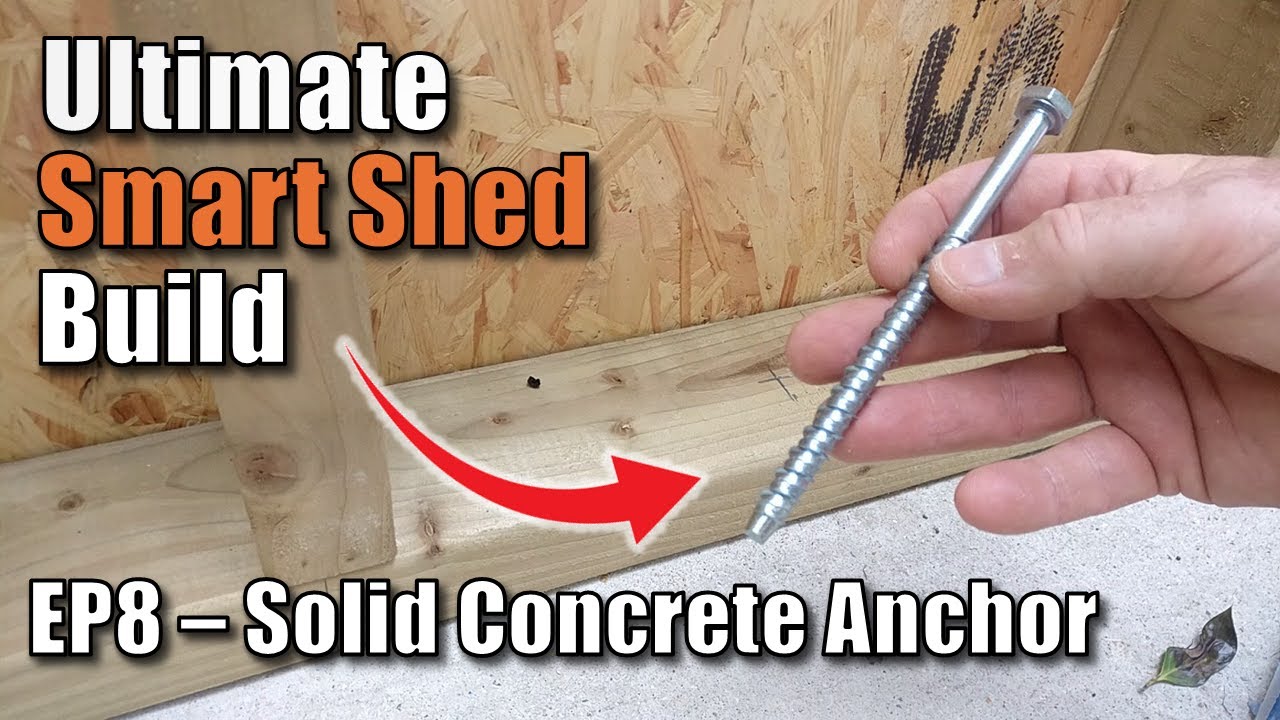
Choosing the Right Concrete Anchors
There are dozens of anchoring options, but for this project, I chose Rawlplug M10 x 150mm Concrete Anchor Bolts.

Why these anchors?
- Edge Performance: These are specifically designed to be used close to the edge of masonry or concrete with a much lower risk of cracking the substrate.
- Thread-Cutting: They cut their own thread directly into the concrete.
- Removable: Unlike traditional expansion bolts, these are reversible. If you ever need to adjust or move the plate, you can simply unscrew them.
Tools You’ll Need
To get over 100mm of “bite” into the concrete, you need the right gear:
- Drill: A high-quality hammer drill (like my DeWalt).
- Bit: A 10mm multi-material or masonry bit (at least 200mm long).
- Washers: M10 washers to spread the load across the timber.
- Cleaning: A vacuum to remove debris from the holes.
Step-by-Step: How to Anchor a Shed to a Concrete Slab
1. Mark and Drill the Timber
Start by marking the center of your 4×2 base plate. Use a standard drill setting to go through the wood first.
2. Hammer Drill the Concrete
Switch your drill to Hammer Mode. I recommend drilling the hole about 10-20mm deeper than the bolt length. This gives any remaining dust a place to settle so it doesn’t block the bolt.

3. Clear the Debris
Crucial Step: Use a vacuum or a blow-out pump to clear the dust from the hole. If the hole is full of dust, the bolt won’t reach its full depth.

4. Drive the Anchor
Place your M10 washer (I used two for extra security) over the bolt. Use a Torx bit or a socket set to drive the anchor home. You’ll feel it cutting into the concrete as it tightens up.

The Result: Rock-Solid Security
I placed these anchors in every other recess all the way around the shed perimeter. This secures the shed against both vertical lift and lateral sliding. With approximately 110mm of the bolt embedded in the slab, this shed isn’t going anywhere!
Related Smart Shed Guides:
- Building the Ultimate Smart Shed (Part 3): How to Build a Concrete Shed Foundation
- Impact Driver vs. Combi Drill: Which One Do You Actually Need?
Anchor Bolts vs. Wedge Bolts vs. J-Bolts: Which is best for your shed?
When it comes to securing a building to concrete, there are three main contenders. Depending on whether you are currently pouring your slab or fixing to an existing one, your choice will change.
| Anchor Type | When to Install | Removable? | Best For… |
| Thread-Cutting Bolts (What I used) | After the concrete has cured. | Yes | Post-pour flexibility and working close to edges. |
| Wedge / Expansion Bolts | After the concrete has cured. | No | Heavy-duty, permanent fixes in the center of a slab. |
| J-Bolts (Cast-in-Place) | During the wet concrete pour. | No | Maximum strength for high-wind areas (if planned ahead). |
1. Thread-Cutting Bolts (The DIY Favorite)
As seen in the video, these bolts (like the Rawlplugs) work like a giant wood screw for concrete.
- Pros: You can drill the hole exactly where your timber sits, ensuring a perfect fit. They don’t rely on expansion, so they are much less likely to crack the edge of your slab.
- Cons: Require a high-torque impact driver or socket set to drive home.
2. Wedge / Expansion Bolts
These have a sleeve that expands as you tighten the nut, “wedging” itself into the hole.
- Pros: Generally cheaper than thread-cutting bolts and very widely available.
- Cons: Because they exert outward pressure, using them too close to the edge of your concrete can cause it to “spall” or crack. They are also permanent—once they are in, they are nearly impossible to remove.
3. J-Bolts (Cast-in-Place)
These are “L” or “J” shaped bolts that you push into the wet concrete during Part 3: The Concrete Pour.
- Pros: The strongest mechanical bond possible. The concrete cures around the bolt.
- Cons: Zero room for error. If your measurements are off by even half an inch, your wall plates won’t fit over the studs. For most DIYers, the risk of getting the placement wrong isn’t worth the extra strength.
Pete’s Verdict
For a project like the Ultimate Smart Shed, I highly recommend Thread-Cutting Bolts. They give you the “pro” level of strength but allow for the “DIY” reality of needing to adjust things slightly as you build.
FAQ: How to Anchor a Shed to a Concrete Slab
What size drill bit do I need for an M10 anchor bolt?
For an M10 Rawlplug Concrete Screw, you should use a 8mm masonry or multi-material drill bit. Unlike expansion bolts that sometimes require a slightly larger hole, these self-tapping bolts need a precise 8mm hole so the threads can bite into the concrete walls.
How deep should I drill into the concrete?
A good rule of thumb is to drill 20mm deeper than the length of the bolt that will be inside the concrete. For my 150mm bolts passing through a 42mm timber, I aimed for a total hole depth of roughly 130mm. This extra “over-drill” depth gives dust and debris a place to sit so the bolt doesn’t bottom out before it’s tight.
How many anchors do I need for a 12×6 shed?
For a standard garden building, you should place an anchor within 300mm (12 inches) of every corner. Along the lengths, space your anchors every 600mm to 1200mm (2–4 feet). For my 12×6 Smart Shed, I placed an anchor in every other recess of the floor frame to ensure total stability against high winds.
How close to the edge of the slab can I drill?
Standard expansion bolts usually require a distance of at least 5 to 10 times the bolt diameter from the edge to avoid “blowouts.” However, because Thread-Cutting Bolts (like the ones I used) don’t exert outward expansion pressure, they are much safer to use closer to the edge—making them ideal for shed base plates.
What should I do if my drill hits metal (rebar or mesh)?
If your drill suddenly stops moving or the speed changes drastically, you’ve likely hit the steel reinforcement mesh. Stop immediately. * Option A: Shift your hole location by 25–50mm.
– Option B: Use a specialized “Rebar Cutter” SDS bit if you absolutely must go through that exact spot.
– Option C: If the bolt is already mostly submerged, you can sometimes use a shorter bolt in that specific location.
Can concrete anchor bolts be removed?
Yes, if you use screw-type anchors like the Rawlplug R-LX or similar “Thunderbolts.” Unlike traditional wedge anchors which are permanent, these can be unscrewed with a socket set or impact driver. This is a lifesaver if you realize your wall is slightly out of alignment after the first few bolts are in!
The Shed Anchoring Checklist
Don’t reach for the drill until you’ve ticked off these steps. Following this order ensures you won’t crack your slab or end up with a bolt that won’t go all the way in.
1. Pre-Drill Prep
- [ ] Verify Square & Level: Use your 3-4-5 rule one last time. Once these bolts are in, moving the shed becomes a massive chore.
- [ ] Mark Your Centers: Mark the middle of your 4×2 timber. I recommend an anchor every 600mm to 1000mm.
- [ ] Check Bolt Clearance: Ensure your 150mm bolt won’t hit any buried conduit or pipes.
2. The Drilling Phase
- [ ] Start Slow: Drill through the timber first with a standard wood bit or your multi-material bit on “rotation only” to get a clean hole.
- [ ] Hammer Mode: Switch your drill to Hammer/Impact once you hit the concrete.
- [ ] Depth Check: Drill 20mm deeper than the bolt’s reach to allow for dust settlement.
- [ ] Clear the Debris: Vacuum the hole thoroughly. Do not skip this. Dust is the #1 reason bolts get stuck halfway.
3. The Final Fix
- [ ] Double Washer: Place two M10 washers over the bolt to prevent the head from sinking too deep into the soft timber.
- [ ] Drive to Torque: Use a socket or Torx bit to drive the anchor until the timber is pulled tight against the concrete.
- [ ] Visual Check: Ensure there are no cracks in the concrete around the hole.
Subscribe Now!
If you found this how to anchor a shed to a concrete slab interesting and are ready to stop guessing and start troubleshooting your own tech plus smart DIY, head over to the Built By Pete YouTube channel! We’ve got hundreds of other DIY projects and smart home tutorials. Click here to subscribe to the BuiltByPete youtube channel and hit the notification bell so you never miss out on the tips, tricks, and step-by-step guides that will simplify your tech life.