ASUS RP-AX58 Setup Guide: Easy Way to Add an AiMesh Node for Perfect Wi-Fi
In this ASUS RP-AX58 Setup guide, i’ll show you how to eliminate “dead zones” in your home or—like me—you’re trying to get a solid Wi-Fi signal out into the garden for a Smart Shed or outdoor office, a standard extender often isn’t enough.
In this guide, I walk you through how to set up the ASUS RP-AX58 Wi-Fi 6 Extender as a dedicated AiMesh node. This creates a seamless “mesh” network where your devices automatically switch to the strongest signal as you move around your property.
Watch the Full ASUS RP-AX58 Setup Video:
See the interface in real-time ASUS RP-AX58 Setup here:
1. Why Choose AiMesh Over a Standard Extender?
Most extenders create a second network (e.g., “Home_Wi-Fi_EXT”), forcing you to manually switch networks. With ASUS AiMesh:
- One Network Name (SSID): Your phone or laptop sees one network and roams between the router and node automatically.
- Centralized Management: You control the node directly from your main ASUS router’s web interface (I’m using the RT-AX88U).
- Self-Healing: If one node goes down, the system re-routes data through other available nodes.
2. Step-by-Step: Your ASUS RP-AX58 Setup Guide
Before you plug anything in, ensure your main ASUS router is powered on and you have access to the web GUI (usually router.asus.com).
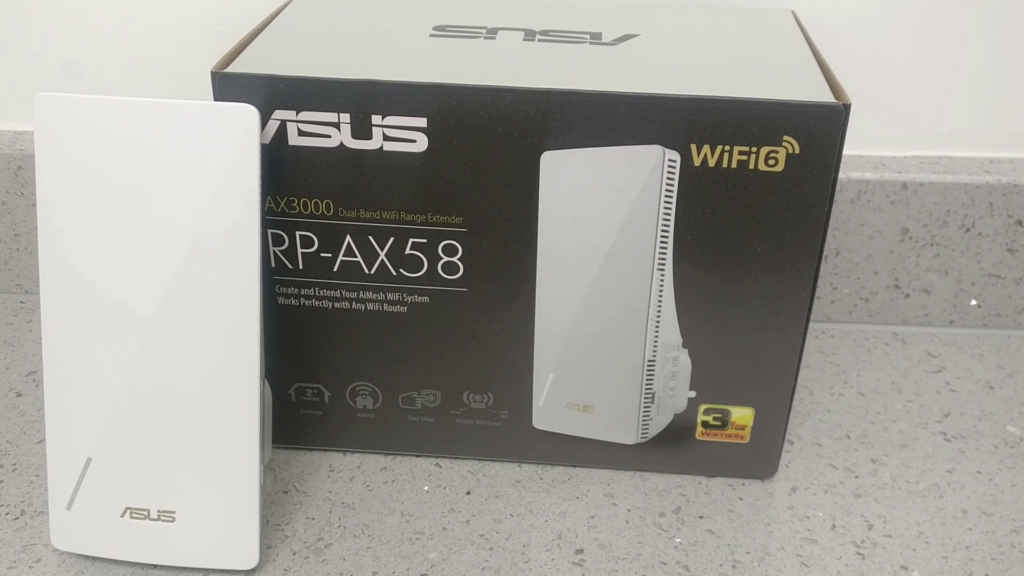
Step 1: Power Up
Plug the RP-AX58 into a socket near your main router for the initial pairing. Once the light begins to flash, it’s ready to be discovered.
Step 2: Search for the Node
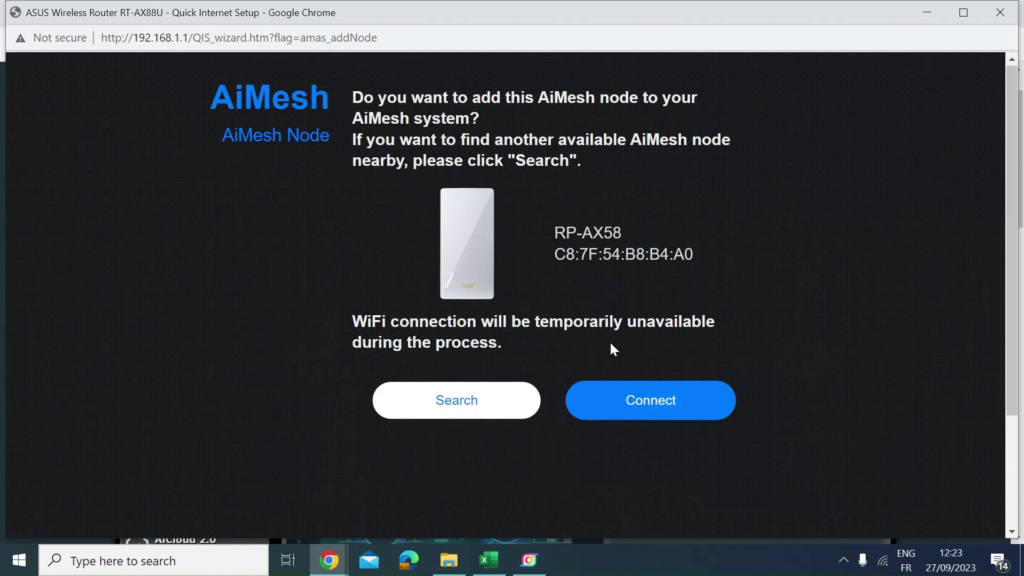
Log into your router and navigate to the AiMesh menu on the left-hand sidebar. Click “Add AiMesh Node.” The router will scan the area; once the RP-AX58 appears, simply click Connect.
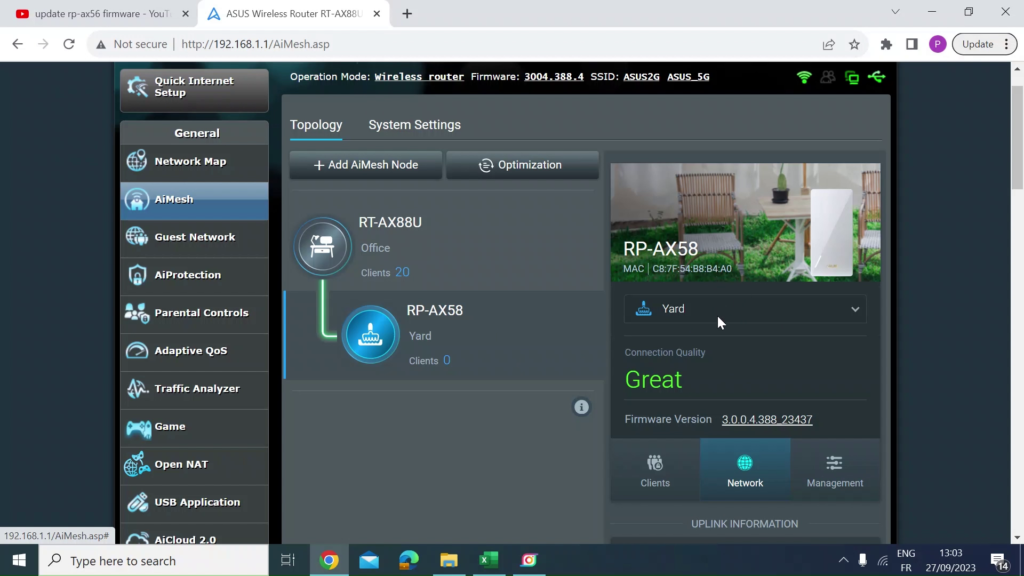
Step 3: Assignment & Optimization
Once successfully added, you can assign the node to a specific room (like the ‘Office’ or ‘Yard’) to keep your management interface tidy.
3. The “Pro” Upgrade: Ethernet Backhaul
While the RP-AX58 works great over a 5GHz wireless connection, you can unlock its full potential using Ethernet Backhaul.
A major benefit of the ASUS RP-AX58 Setup is the ability to use wired ethernet for backhaul for maximum. If you have an Ethernet port near your node (like I do for my garden setup), simply plug it in. The system will automatically switch from a 5GHz wireless backhaul to a 1Gbps Wired Connection.
Why does this matter? It frees up the 5GHz Wi-Fi band entirely for your devices (phones, cameras, TVs) instead of using that bandwidth to “talk” back to the router. It’s the difference between a “good” connection and “top speed”.
4. Management & System Settings
Once the ASUS RP-AX58 Setup is live, you can tweak several settings via the Management Tab:
- Connection Priority: Set it to “Auto” or force “Ethernet First.”
- Radio Toggles: Ensure both 2.4GHz and 5GHz are enabled for maximum device compatibility.
- System Reboot: You can remotely reboot or optimize the node without having to physically unplug it.
5. Summary Table: ASUS RP-AX58 Specs
| Feature | Specification | Benefit |
| Standard | Wi-Fi 6 (802.11ax) | Faster speeds and better capacity for multiple devices. |
| Speed | Up to 3000 Mbps | Smooth 4K streaming and lag-free gaming. |
| Ports | 1 x Gigabit Ethernet | Allows for 1Gbps Wired Backhaul for maximum stability. |
| Compatibility | Works with any ASUS AiMesh Router | Easy to expand your existing network. |
6. ASUS RP-AX58 Setup Troubleshooting: What if the Node isn’t found?
Even though the ASUS RP-AX58 Setup process is usually seamless, you might occasionally run into a “No device found” error. If your RP-AX58 isn’t appearing in the search, follow these pro-steps:
1. The “Proximity” Rule
For the initial pairing, place the RP-AX58 in the same room as your main router (within 1–3 meters). Once the “handshake” is successful and the node is added to the system, you can unplug it and move it to its permanent location in the garden or office. It will remember the settings!
2. Perform a Hard Factory Reset
If the device was previously used or a setup attempt failed, it may not be in “Discovery Mode.”
- Locate the Reset Button on the side of the RP-AX58.
- Use a paperclip to press and hold it for 5–10 seconds until the power LED starts blinking.
- Wait for the device to reboot. Now try the “Add AiMesh Node” scan again.
3. Firmware Parity
AiMesh works best when both the Router and the Node are on the latest software.
- Check your main router’s Firmware Upgrade page.
- If the RP-AX58 is brand new, it might need a manual update. You can plug it into a laptop via Ethernet, navigate to
192.168.50.1(default ASUS extender IP), and upload the latest firmware from the ASUS Support site before trying to pair it as a node.
4. Enable “Allow Search”
Ensure your main router’s Wi-Fi isn’t “Hidden.” If you have disabled SSID broadcast for security, the AiMesh scan will struggle to find the node. Temporarily enable the broadcast, pair the node, and then you can hide it again if necessary.
5. Why does the LED stay Red?
If you’ve moved the node to its final location and the LED is Solid Red, it means the signal from the main router is too weak.
- The Fix: Move the node one room closer to the router. You want it at a point where it still receives a “Great” or “Good” signal, so it has enough “fuel” to repeat that signal further out.
Overall the ASUS RP-AX58 Setup is one of the easiest ways to expand an AiMesh network. Whether you are using it for a garden office or just to fix a deadzone in the house, the Wi-Fi 6 performance is a game changer.
What’s Next? Now that the mesh node is live, I’ll be running speed tests to see how it handles the roaming transition from the house to the garden. Stay tuned!
ASUS RP-AX58 Setup Frequently Asked Questions (FAQ)
1. Can I use the RP-AX58 with a non-ASUS router?
Yes, you can use it as a standard Universal Wi-Fi Extender with any router. However, you will lose the AiMesh benefits like seamless roaming (one Wi-Fi name) and centralized management. To get the “Smart” features shown in my video, you need an ASUS AiMesh-compatible main router.
2. Does the RP-AX58 support Wi-Fi 6 (802.11ax)?
Absolutely. It is a Dual-Band Wi-Fi 6 device. This is a huge upgrade over older Wi-Fi 5 (AC) extenders because it handles multiple smart home devices simultaneously without dropping the connection—perfect for a modern “Smart Shed” setup.
3. What is “Ethernet Backhaul” and do I need it?
Ethernet Backhaul is when you connect the node to your router using a physical cable. You don’t need it (it works great wirelessly), but it is highly recommended. It provides a dedicated 1Gbps “highway” for data, leaving your Wi-Fi bands free for your phones, cameras, and laptops.
4. How many AiMesh nodes can I add to my network?
ASUS recommends up to 5 nodes for the best stability. For most UK homes and gardens, 1 or 2 RP-AX58 nodes strategically placed will provide “Full Bars” coverage everywhere.
5. Will my devices automatically switch between the router and the node?
Yes! That is the magic of AiMesh. The system monitors your device’s signal strength and “hands it over” to the node as you walk toward the garden, ensuring you don’t drop that Zoom call or YouTube stream.
6. Can I turn off the LED lights on the RP-AX58?
Yes. If you have the node in a bedroom or office and the lights are too bright, you can log into the ASUS Router App or the web interface and toggle the LED “Off” in the Management tab.
Further Reading
I hope guide made your ASUS RP-AX58 Setup straightforward; it’s a fantastic bit of kit for expanding a home network. Here’s some other articles you may find intereting.
- Never Lose Your Connection: Easy Internet Backup with ASUS Dual WAN
- Not Just For WiFi: The 7 Hidden Router Features Hiding in Plain Sight
- Why You Need a Cheap Ethernet Cable Tester
- How to Run a Continuous Ping Command (The Easiest Way to Diagnose Network Issues)
Subscribe Now!
If you found this ASUS RP-AX58 Setup guide interesting and are ready to stop guessing and start troubleshooting your own tech plus smart DIY, head over to the Built By Pete YouTube channel! We’ve got hundreds of other DIY projects and smart home tutorials. Click here to subscribe to the BuiltByPete youtube channel and hit the notification bell so you never miss out on the tips, tricks, and step-by-step guides that will simplify your tech life.