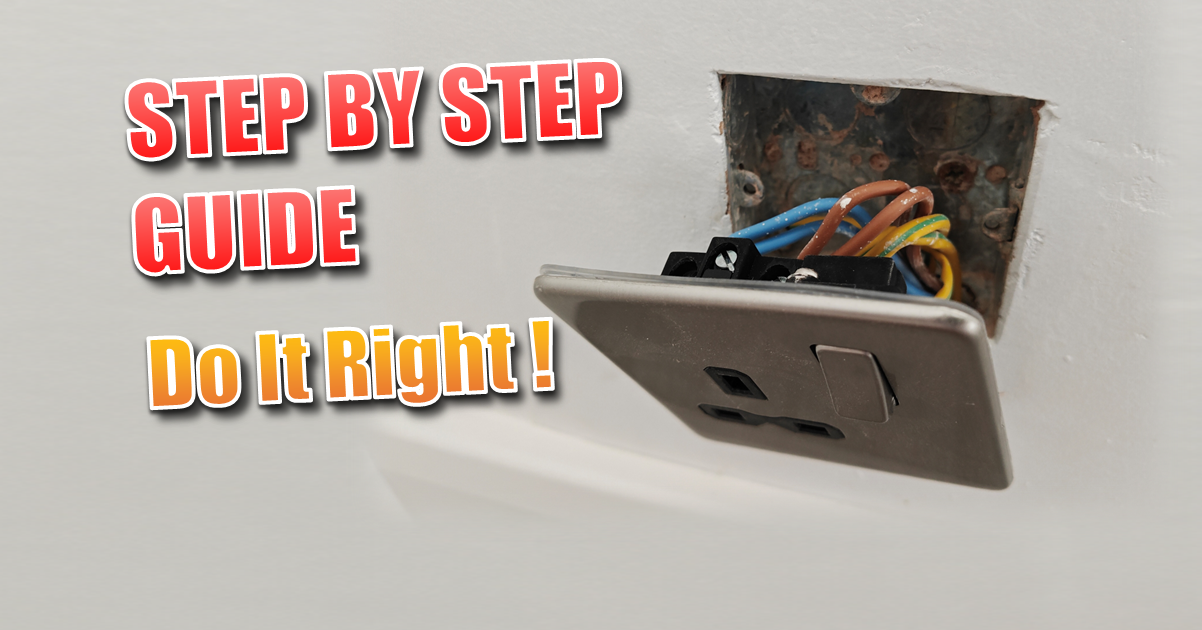
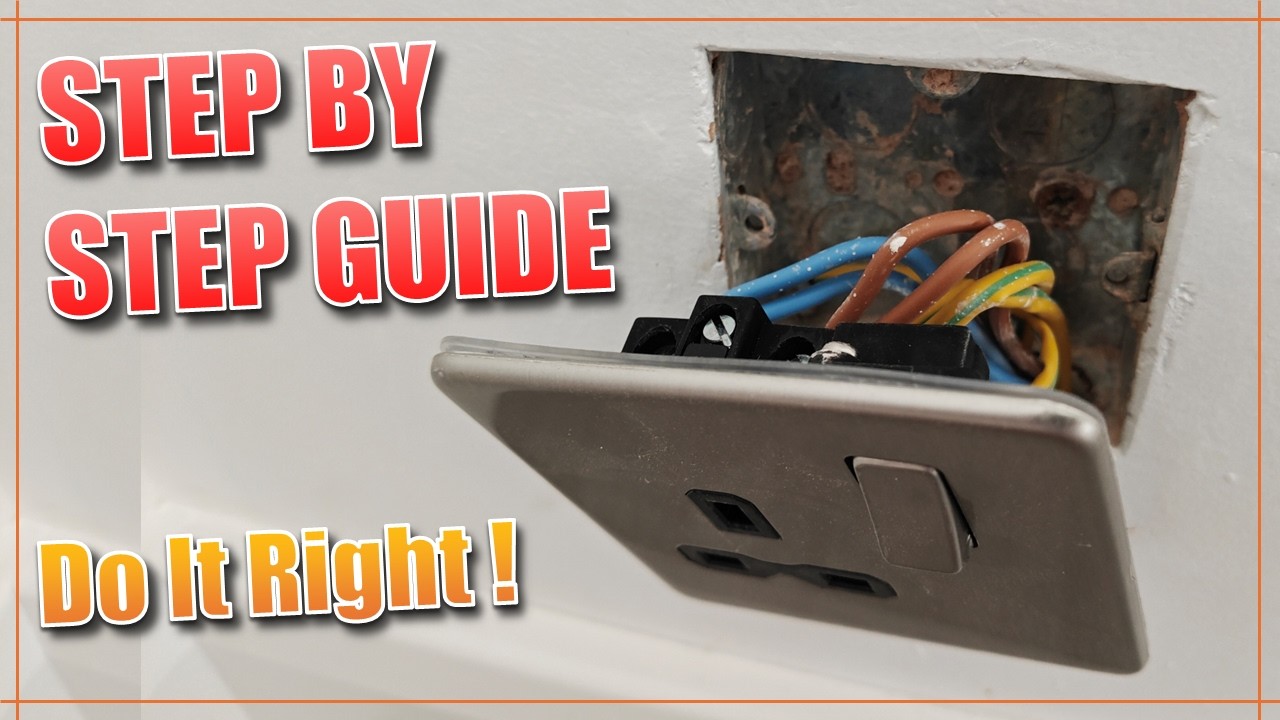
How to Wire a Wall Socket Correctly (Step by Step Guide)
How to Wire a wall socket Correctly. Are you looking to upgrade your home with modern, decorative faceplates, or do you simply need to replace a damaged unit? Changing a single wall socket is a perfect entry-level DIY task that can significantly improve the look of your room.
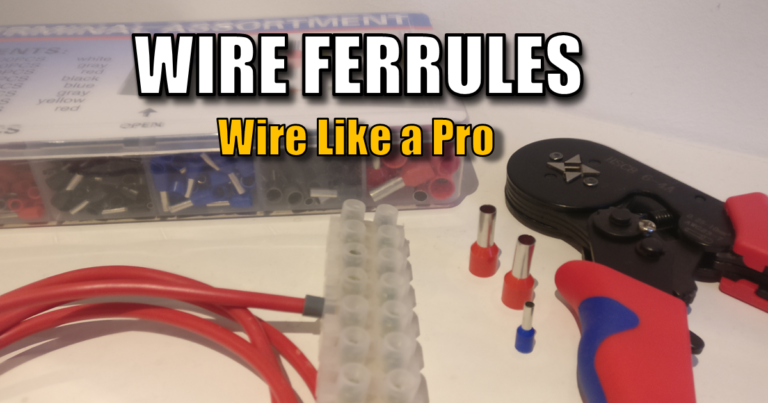
In this guide, I’ll show you how to wire a wall socket correctly. For this tutorial I’m using a UK single-gang 13 amp socket with a premium Knightsbridge Screwless Faceplate in brushed stainless steel.
Watch the Full Step-by-Step Tutorial
Safety First: Isolating the Power
Before you touch any wiring, you must isolate the circuit. Go to your consumer unit (fuse box) and switch off the circuit breaker for the sockets you are working on.

Pro Tip: Never trust a label. Use a plug-in tester or a multimeter to confirm the power is truly off before unscrewing the old socket.
Top 5 Mistakes to Avoid When Changing a Socket
Even a simple job can go wrong if you rush. Here are the most common pitfalls to watch out for along the way:
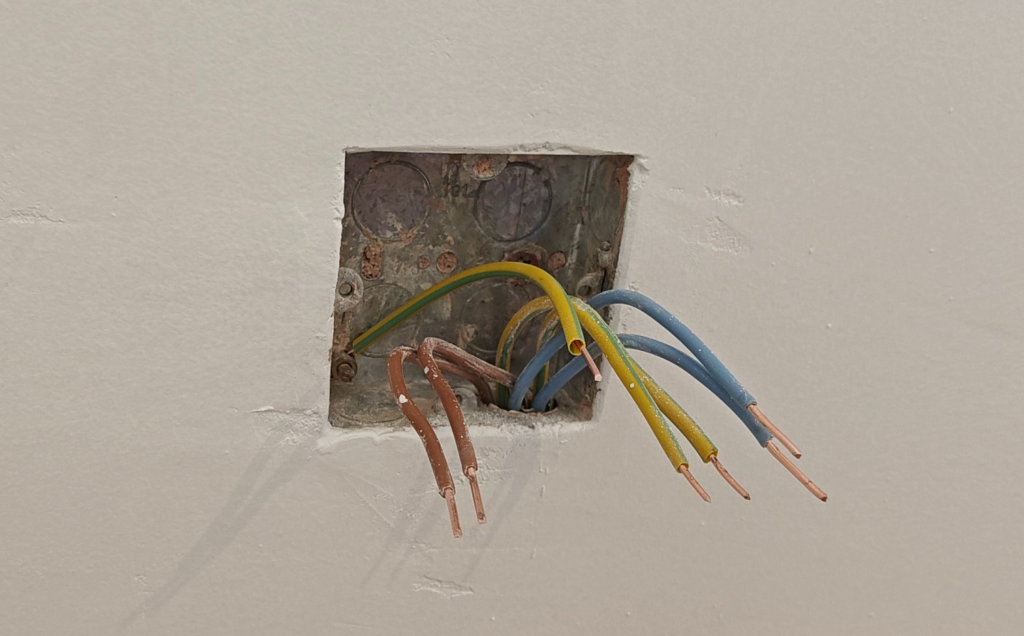
- Stripping Too Much Copper: Exposed live copper sitting behind the socket is a major fire risk. Aim for 10–12mm of bare wire.
- The “Screw Through Wire” Trap: When pushing the socket back, wires can get trapped. If a mounting screw pierces the insulation, it can make the metal faceplate live.
- Forgetting to Earth the Metal Backbox: If you have a metal backbox, it must be earthed. Use a “fly lead” from the socket’s earth terminal to the backbox.
- Loose Connections: UK ring circuits often have two sets of wires. If one is loose, it can cause “arcing.” Always perform a tug test on every wire.
- Crushing Wires: Forcing a socket into a shallow box can damage the insulation. Ensure your wires are folded neatly in a ‘concertina’ shape.
Understanding the Wiring (New vs. Old Colors)
In the UK, we currently use the “Harmonised” colour code. However, if your home was built or rewired before April 2004, you will see different colors.
| Connection | New Colour (Post-2004) | Old Colour (Pre-2004) |
| Live (L) | Brown | Red |
| Neutral (N) | Blue | Black |
| Earth (E) | Green & Yellow | Bare Copper / Green |
Note: If you have bare copper earth wires, always slide a green/yellow earth sleeve over them before connecting.
Step-by-Step Installation
1. Prepare the Chassis
The Knightsbridge model I’m installing is a screwless design. This means the chassis (the part with the switches) is installed first, and a decorative plate clips on later for a clean finish.
2. Terminate the Connections
Locate the letters stamped into the back of the socket:
- L (Live): Insert the brown (or red) wires.
- N (Neutral): Insert the blue (or black) wires.
- Earth Symbol: Insert the yellow/green wires.
The Tug Test: Tighten the screws and give each wire a firm pull. If it moves, re-seat it and tighten again. Ensure no bare copper is visible outside the terminal.
3. Folding and Fixing
Carefully fold the wires into the backbox. Avoid placing wires directly behind the screw holes. Align the socket with the threaded inserts and tighten the mounting screws until the unit is level and flush with the wall.
4. Snap on the Faceplate
For screwless models, align the clips and push the decorative plate onto the chassis until it clicks into place. Turn the power back on and test!
Parts : I sourced the wall socket from Amazon. Here are the links if you want to check them out. Its a screwless stainless steel socket. There are some other good products from Knightsbridge to explore.
FAQ : How to Wire a Wall Socket Correctly
Is it legal to change my own electrical sockets in the UK?
Yes. Under Part P of the Building Regulations, replacing an existing socket on a “like-for-like” basis is considered non-notifiable work. This means you do not need to inform building control or hire an electrician, provided you are competent to do the work safely. However, installing a new socket in a new location or adding a new circuit usually requires professional certification. Take a look at the UK Domestic Wiring Guide article for more information.
I have red and black wires—is this safe?
Yes, but it indicates your home’s wiring was installed before April 2004. In this “old” colour code, Red is Live and Black is Neutral. When installing a new socket, connect the Red wire to the ‘L’ terminal and the Black wire to the ‘N’ terminal. (Refer to the table in the main guide for the full colour-code comparison).
Why are there two sets of wires in my socket?
Most UK homes use a “Ring Main” circuit. This means the electricity travels in a loop, entering the socket from one cable and leaving through another to power the next socket in the chain. When replacing the socket, both sets of wires must be securely terminated into the same respective terminals (Live with Live, Neutral with Neutral).
My new metal faceplate doesn’t have an earth terminal. What do I do?
Almost all decorative metal faceplates will have an earth terminal on the chassis. If it doesn’t, it is likely a “Class II” double-insulated component, but these are rare for sockets. Always ensure your earth wires are connected to the earth terminal on the socket chassis. If you have a metal backbox, you should also run a small “fly lead” (a scrap of earth wire) from the socket’s earth terminal to the backbox’s earth terminal.
What should I do if the wires are too short to reach the new socket?
Never put the wires under tension. If they are too short, you can extend them using a maintenance-free connector (like a Wago connector) and a small piece of matching 2.5mm² Twin and Earth cable. Ensure the joint is tucked neatly into the backbox.
Can I replace a single socket with a double socket?
Yes, but you will likely need to replace the backbox in the wall, as a single backbox is too small for a double socket. You can buy “converter sockets” that allow a double faceplate to fit onto a single backbox, though they sit slightly further out from the wall.
Why is my plug-in tester showing a “No Earth” fault?
This usually means an earth wire has come loose during installation or was never connected properly in the first place. Turn off the power, unscrew the socket, and check that all green/yellow wires are firmly gripped in the earth terminal. Perform a “tug test” to be sure.
Can I use a metal faceplate on a plastic backbox?
Yes. However, because the backbox is plastic, it cannot be earthed. You must ensure the earth wires are securely connected to the terminal on the metal faceplate itself to ensure the plate is safe to touch.
Why are there three sets of wires in my socket?
Usually, you’ll see two sets (the “in” and “out” of a ring main). If you see three sets, it typically means someone has already taken a spur (an extension) from this socket to power another one elsewhere.
The Pro Tip: Ensure all three wires are twisted neatly and clamped securely. If you can’t fit three 2.5mm wires into the terminal comfortably, you may need a deeper backbox or a socket with larger terminals.
Can I “spur off a spur”?
No. Under UK regulations, you can only run one unfused spur (powering one single or one double socket) from a point on the ring. You cannot then run another cable from that new socket to a third one.
The Fix: If you need multiple sockets from one point, you must install a Fused Connection Unit (FCU) first. This limits the total current to 13A, protecting the single cable from overloading.
My backbox has two lugs, but one is fixed and one moves. Why?
his is a lifesaver for professional finishes. The moving lug allows you to tilt the socket slightly to get it perfectly level, even if the backbox was installed wonky.
The Pro Tip: Always use a small spirit level across the top of the faceplate before the final tighten.
How far should my socket be from a kitchen or bathroom sink?
Kitchens: There is no “hard” rule in BS 7671, but the IET recommends a minimum of 300mm horizontally from the edge of a sink to prevent splashes hitting the socket.
Bathrooms: Sockets must be at least 3 metres away from the boundary of “Zone 1” (the bath or shower). In most UK bathrooms, this effectively means no sockets are allowed at all.
What do I do if I find a “Ring within a Ring”?
If you open a socket and find it has been cross-connected in a way that creates a sub-loop, this is a serious fault. It can lead to cables carrying way more current than they are rated for without the breaker tripping.
The Verdict: If your wiring looks like a “nest” rather than a clear “in and out,” stop and call a pro. This requires a continuity tester to map out properly.
Is it okay to use a 20A breaker for my sockets instead of 32A?
Yes, if the circuit is a Radial (one-way run). Radials are common in extensions or small flats. A 20A breaker is the correct protection for a 2.5mm cable running in a radial configuration. Never “upgrade” a 20A breaker to 32A just because you want more power; you’ll risk a fire.
Ready for Your Next Project?
If you’re on a roll with your home improvements, check out these other “Built By Pete” guides:
- How to Wire a Ceiling Rose – Master the basics of UK lighting circuits.
- UK Domestic Wiring Guide – A deeper dive into the cables behind your walls.
- PoE Explained – Perfect for adding smart tech to your new sockets.
Subscribe Now!
If you found this guide for how to wire a wall socket correctly interesting and are ready to stop guessing and start troubleshooting your own tech plus smart DIY, head over to the Built By Pete YouTube channel! We’ve got hundreds of other DIY projects and smart home tutorials. Click here to subscribe to the BuiltByPete youtube channel and hit the notification bell so you never miss out on the tips, tricks, and step-by-step guides that will simplify your tech life.