Professional Junction Boxes: Building with DIN Rail Terminal Blocks (UK Guide)
When you are managing multiple garden lighting and power circuits, a standard “choc block” or a mess of loose connectors won’t cut it. To build a system that is organized, safe, and built to last, you need to use DIN Rail Terminal Blocks. DIN rails are the long metal strips that form the core part of a global industry standard component rail-mounting system in equipment cabinet racks. DIN rails are designed for securely attaching electrical and industrial control products – such as circuit breakers, DIN rail terminal blocks, power supplies, actuators, solenoids and so on – inside a typical equipment rack housing cabinet or frame.
In this guide, I’m taking you through the exact process of building a modular, junction box—perfect for separating lighting and mains power circuits while staying compliant with UK regulations.
Electrical Safety Disclaimer
Safety First…….The information provided in this guide and the accompanying video is for educational and entertainment purposes only. Electrical work can be dangerous and, if performed incorrectly, can result in fire, injury, or death. All electrical installations in the UK must comply with BS 7671 (IET Wiring Regulations). Under Part P of the Building Regulations, most outdoor electrical work is “notifiable” and must be certified by a qualified professional. If you are not a competent, qualified person, do not attempt to connect these systems to a mains supply yourself. Built By Pete accepts no liability for any damage, injury, or legal non-compliance resulting from the use of this information. Always isolate the power at the consumer unit before beginning work.
Watch the Full Build Tutorial:

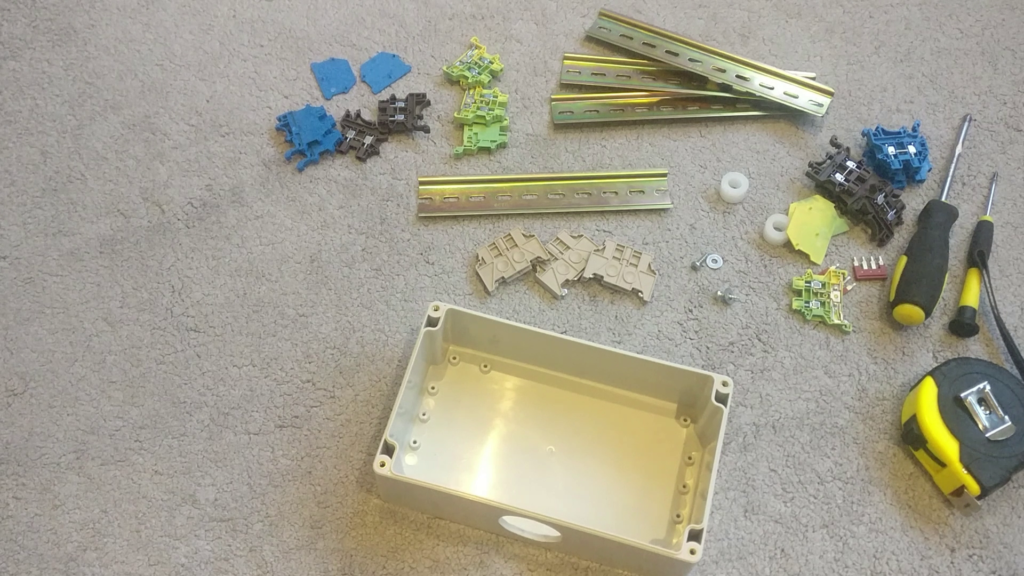
Tools & Materials Used
- Enclosure: IP67 ABS (200mm x 120mm x 75mm) for outdoors or a standard ABS/Metal box for indoors.
- 35mm DIN Rail: Standard steel or aluminum mounting rail.
- DIN Rail Terminal Blocks: 2mm (Lighting/20A) and 4mm (Mains/32A) note: refer to manufacturer for correct rating.
- End Brackets/Posts: To lock the blocks in place and prevent sliding.
- Jumper Bars: To “common” the mains power blocks (Live and Neutral).
- Blanking Plates: To insulate the open side of the terminal runs.
Step-by-Step: Building With DIN Rail Terminal Blocks
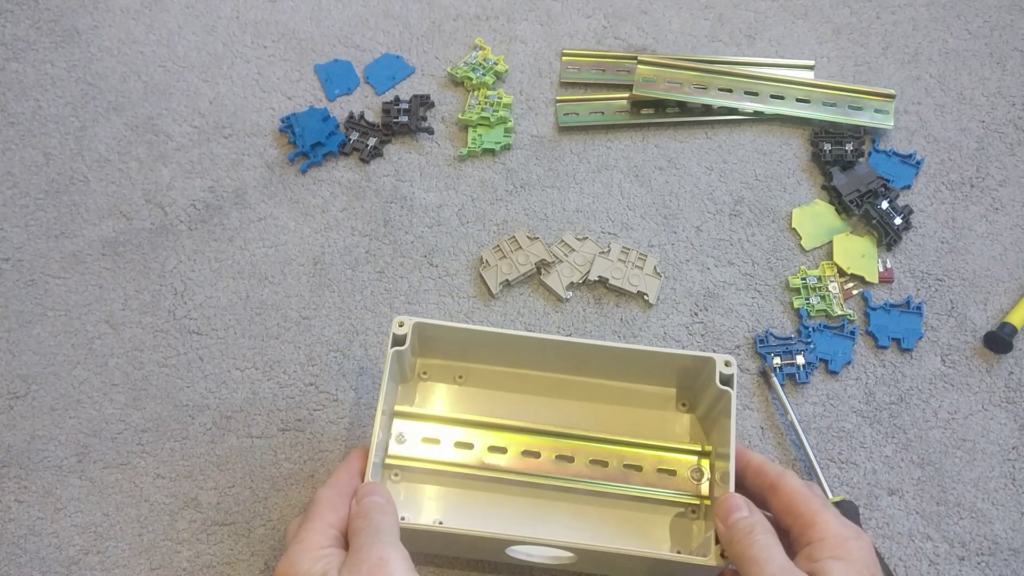
1. Preparing the Enclosure
Drill your conduit entry holes in the bottom of the box. For outdoor use, always use IP68-rated cable glands to maintain the waterproof seal.
- The Pro Tip: Use small plastic spacers to raise the DIN rail off the base. This creates a gap behind the rail for cable routing and prevents internal condensation from touching the terminals.
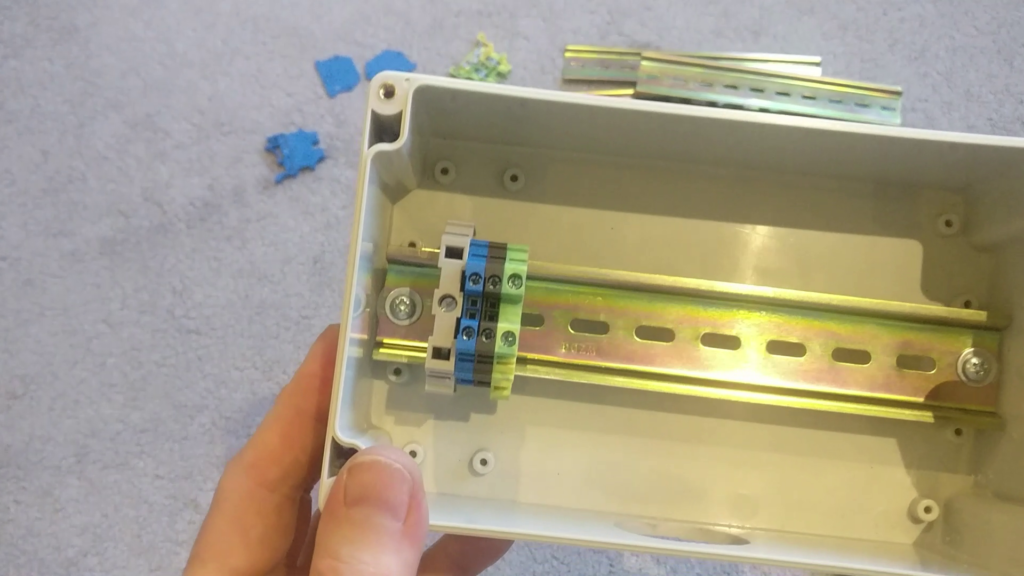
2. The Lighting Circuits (2mm Blocks)
- Anchor the Rail: Slide your first End Post onto the rail and tighten it.
- Circuit Assembly: Clip in your first circuit: 1x Blue (Neutral), 1x Brown (Live), and 1x Green/Yellow (Earth).
- Earthing: Use Earth blocks with metal feet. This automatically earths the DIN rail, providing a safe path for fault currents.
- Insulation: Attach a Blanking Plate to the open side of the final block before sliding on the middle End Post.
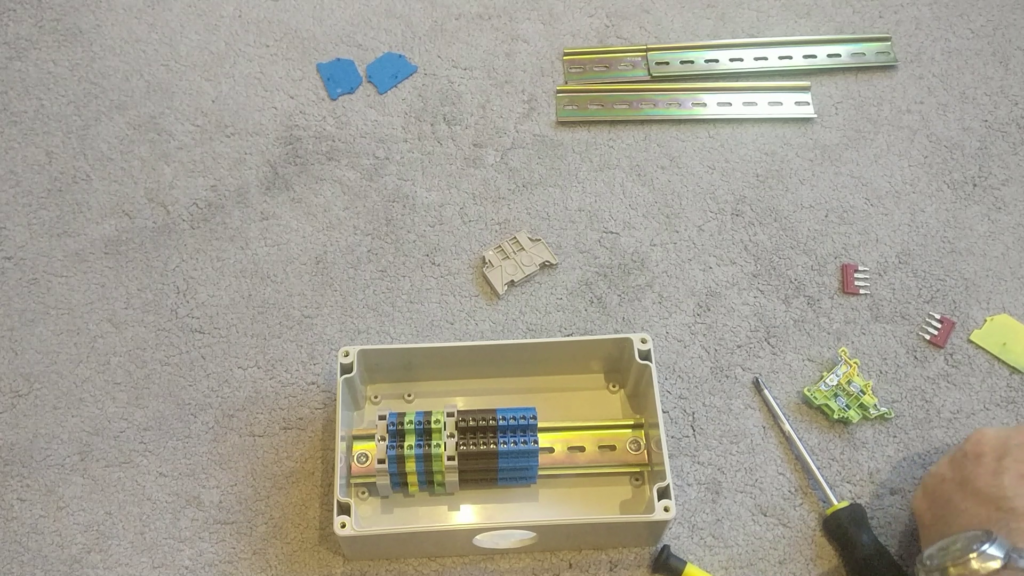
3. The Power Circuits (4mm Blocks)
- Clip the Run: Add 4x Brown (Live) blocks, 4x Blue (Neutral) blocks, and 3x Earth blocks.
- Commoning: Insert Jumper Bars into the center of the Live and neutral DIN rail terminal blocks. This allows one main supply feed to power multiple garden outlets.
- Final Lock: Snap on the last Blanking Plate and the final End Post to secure the entire row.
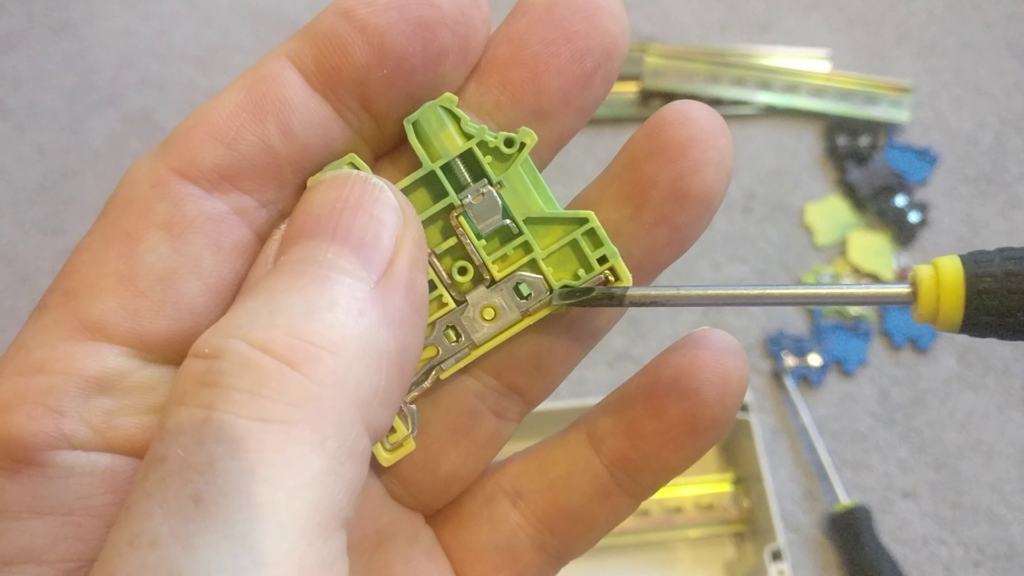
4. Earth DIN Rail Terminal Blocks
The earth terminals are slightly different in that the metal clamp passes the earth circuit between the terminal and the rail making the DIN a convenient common earth rail.
The advantages of a DIN rail system
- They save time and work – components simply snap or slide into place on the DIN rail, rather than having to panel mount each individual component separately.
- They save space – DIN rails allow for tight configurations of components and provide a convenient site for bringing internal and external wiring circuits together, ideal in limited space applications
- They’re cost-effective, both in terms of DIN rail pricing itself and the potential it offers for high-density adjacent mounting – this can significantly reduce the overall amount of wiring and cabinet space needed
- DIN rail terminal blocks promote neat and well-organised component layout, which is better for all-round safety and maintenance access
Staying Code-Compliant (BS 7671:2018+A2:2022)
To stay on the right side of UK Wiring Regulations, you must meet these five key requirements when using your DIN rail terminal blocks:
1. The Accessibility Rule (Regulation 526.3)
Every electrical connection must be accessible for inspection and testing. Because standard DIN rail terminal blocks use screw clamps, you cannot hide this junction box under floorboards or behind plasterboard. It must remain accessible.
2. Enclosure & IP Ratings (Regulation 416.2)
- Indoors: Requires at least IP2X (protection against fingers touching live parts).
- Outdoors: Requires a higher rating, such as IP65 or IP67, to protect against water jets and dust.
3. Wiring Colour Codes (UK Harmonised)
| Function | Colour (UK Harmonised) | Alphanumeric Code |
| Live / Phase | Brown | L |
| Neutral | Blue | N |
| Earth | Green & Yellow | E or ⏚ |
You can discover more by reading our guide on UK domestic wiring.
4. Mechanical Security & Strain Relief (Reg 522.8.5)
Cables entering the box must be secured using cable glands so that a tug on the wire doesn’t pull the conductor out of the terminal. You must use end brackets to prevent the blocks from sliding on the rail.
5. Identification
It is best practice to use markers on the terminals themselves to identify which circuit is which. If the box contains high voltages a warning label is mandatory.
Important: When to Consult a Professional
While building a junction box is a great DIY project for your DIN rail terminal blocks, UK law has strict rules on who can connect them to your home’s power supply.
The Part P Warning: Under UK Building Regulations, most outdoor electrical work is notifiable. This means it must either be performed by a registered competent person or inspected by Local Authority Building Control. If you aren’t a qualified electrician, do the “bench work” of building the box, but hire a pro for the final connection and testing.
DIN Rail Terminal Blocks: Frequently Asked Questions
Q: Can I use these blocks both indoors and outdoors?
A: Yes! The blocks are universal. However, for outdoor use, you must house them in an IP-rated waterproof enclosure as shown in the video. For indoors, a standard ABS or metal box is fine.
Q: Do I need to earth the DIN rail?
A: Yes. By using an Earth block, you ensure the rail is bonded to the main earth of your house.
Q: What is a “Jumper Bar”?
A: It’s a metal comb that connects multiple terminals together, creating a “common” bus. This is much safer and neater than trying to jam two wires into one terminal.
Further Reading
- Why You Need Wire Ferrules for the Best Crimp Connections
- The 5-Minute Trick: How to Easily Straighten Cables and Remove Annoying Kinks
- UK Domestic Wiring Explained: A Homeowner’s Guide to Safety and Circuits
- How to Wire a Ceiling Rose: The Ceiling Rose Explained
Built By Pete Safety Tip: Always isolate the power at the consumer unit before opening any electrical enclosure. Stay safe, and if in doubt, call a pro!
Subscribe Now!
If you found this DIN Rail Terminal guide helpful and are ready to stop guessing and start troubleshooting your own tech and smart DIY, head over to the Built By Pete YouTube channel! We’ve got hundreds of other DIY projects and smart home tutorials. Click here to subscribe and hit the notification bell so you never miss out on the tips, tricks, and step-by-step guides that will simplify your tech life.