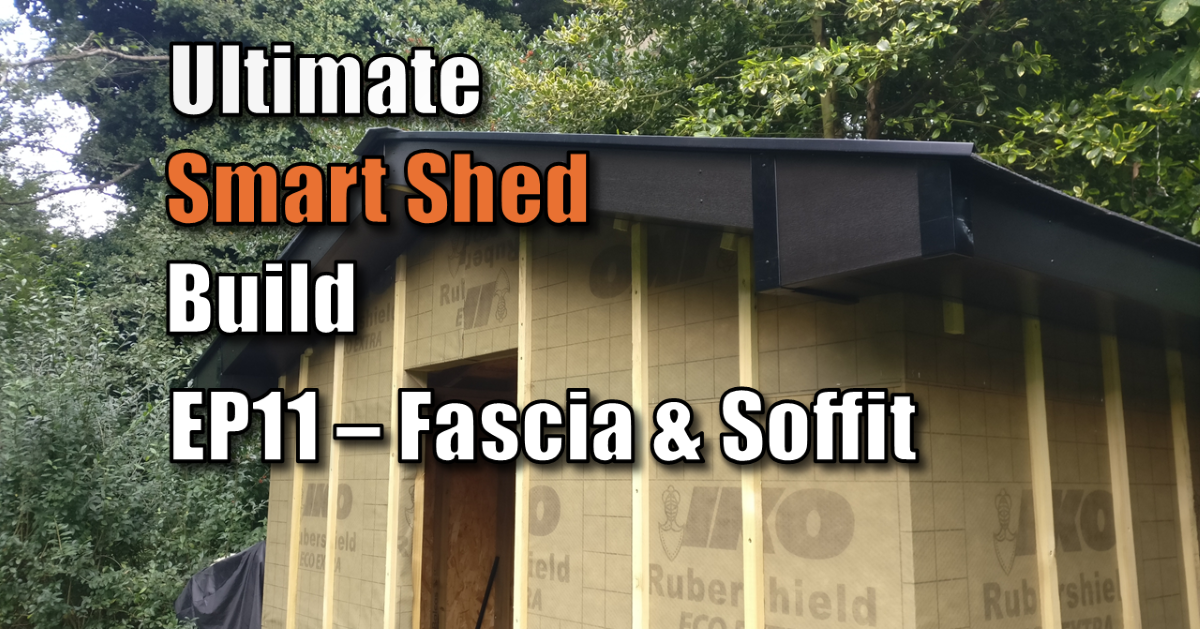
How to Fit Soffits and Fascias & Frame a Bird Box | ULTIMATE Smart Shed (Part 11)
Learning how to fit soffits and fascias — along with mastering gable box-end framing—is the critical bridging step between completing your roof structure and making your building exterior weather-tight.
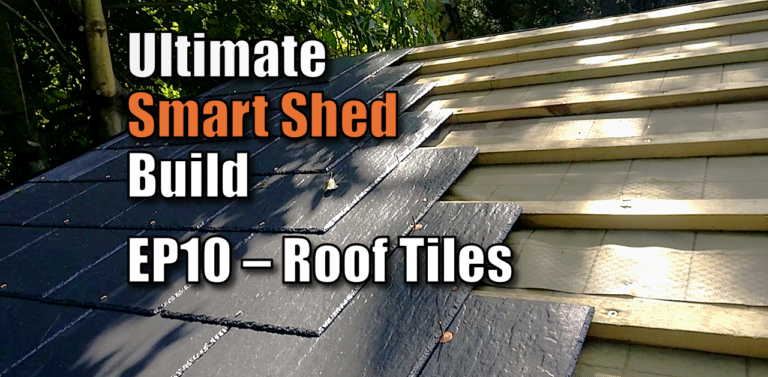
Welcome back to the Ultimate Smart Shed build series! Following on from our previous episode where we laid our synthetic slate roof tiles and dry verge system, it’s time to seal the perimeter roof line.
Buying a standard garden shed usually leaves you with thin, raw timber bargeboards that rot, cup, and split after exposure to harsh winter weather. To ensure this outbuilding lasts over 25 years without maintenance, I’m installing high-density, black woodgrain uPVC fascias, vented soffit boards, and custom timber sub-framing.
In this detailed step-by-step how to fit soffits and fascias tutorial, I’ll walk you through setting up vertical counter-battens for wall ventilation, framing timber sub-fascias, fitting uPVC soffit J-channels, and solving the trickiest geometry in roof building: framing a bird box (box end) return.
Step 1: Mounting Vertical Counter-Battens for Wall Ventilation
Before installing any soffit trim or exterior cladding, you must establish an air cavity across your walls to allow moisture to evaporate.
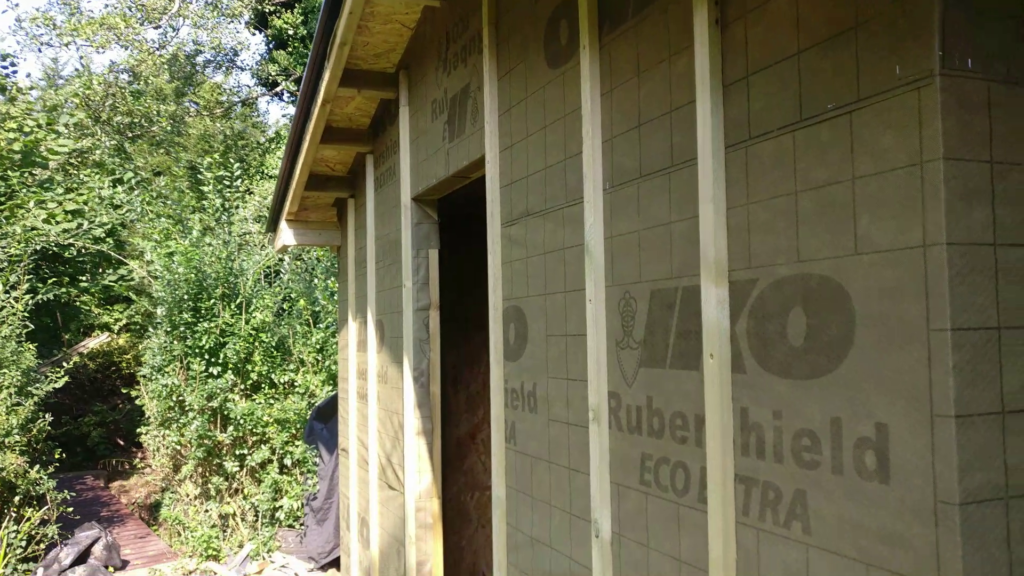
- Timber Size & Sourcing: I used treated timber battens measuring 25mm x 38mm (1″ x 1.5″), using off-cuts left over from our slate roofing process to minimize material waste.
- Fixing to Wall Studs: Rather than fixing battens into OSB alone, I located our internal $4 \times 2$ stud frames (spaced at 16-inch / 406mm centres). Using 80mm $\times$ 5mm wood screws driven directly through the batten, breathable membrane, and OSB, each screw bites 40–50mm deep into the solid structural studs.
- The Ventilation Void: Never mount cladding directly flush to a wall membrane. The 25mm cavity created by these battens allows continuous air movement behind the future feather-edge weatherboard, preventing damp build-up, rot, and interstitial condensation.
Pro Tip: Mount vertical battens level with the bottom edge of the OSB wall, leaving a small relief gap at the base. This space will later accommodate an insect mesh trim to allow airflow while keeping spiders, wasps, and rodents out of your wall cavity.
Step 2: Framing the Sub-Fascia & Bird Box Return (Box End)
The gable box end (often called a “bird box”) is the structural corner junction where the sloping gable bargeboard meets the flat horizontal eaves fascia.
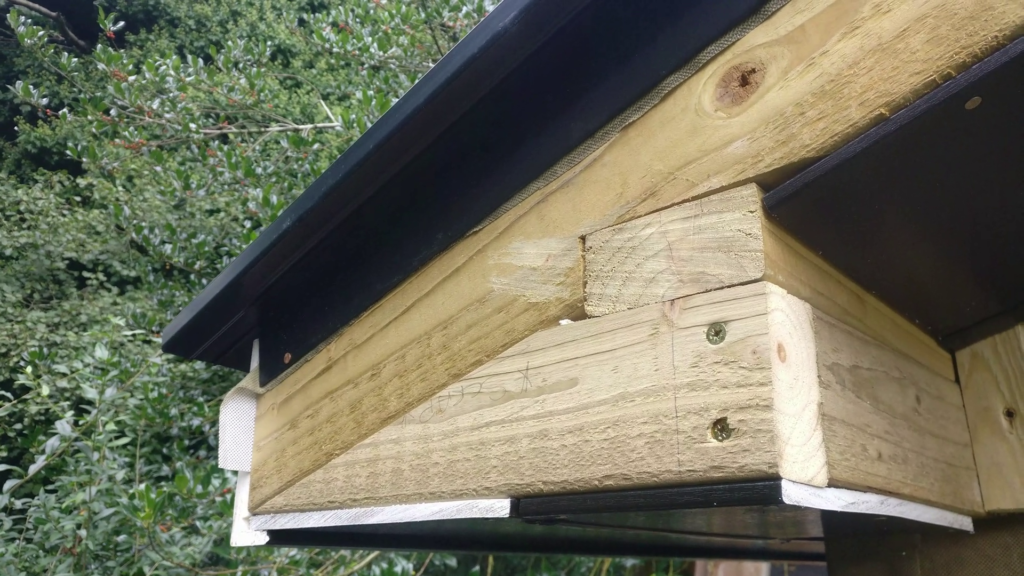
- Leveraging Roof Overhangs: In Part 9, we extended our central double top plate ridge beam by 300mm. This extension provides the upper anchor point for the bird box framing.
- Building the Box: Clamping an offcut of $4 \times 2$ structural timber ($100\text{mm} \times 50\text{mm}$) flush with the eaves overhang, I leveled it horizontally using a spirit level.
- Notching & Screwing: I marked the intersecting angles with a pencil, cut out a support wedge using a circular saw, and secured the frame rigidly into place using long construction screws driven into the eaves rafter tail and an upward pocket screw to lock the corner tight.
This structural sub-assembly gives you a rigid, perfectly plumb timber frame to fix your final uPVC fascias and box-end boards onto.
Step 3: Installing Soffit Boards & The J-Channel System
When learning how to fit soffits and fascias completely solo, holding a 5-metre length of flexible plastic overhead while driving pins can be frustrating. Using a receiving channel simplifies this stage dramatically.
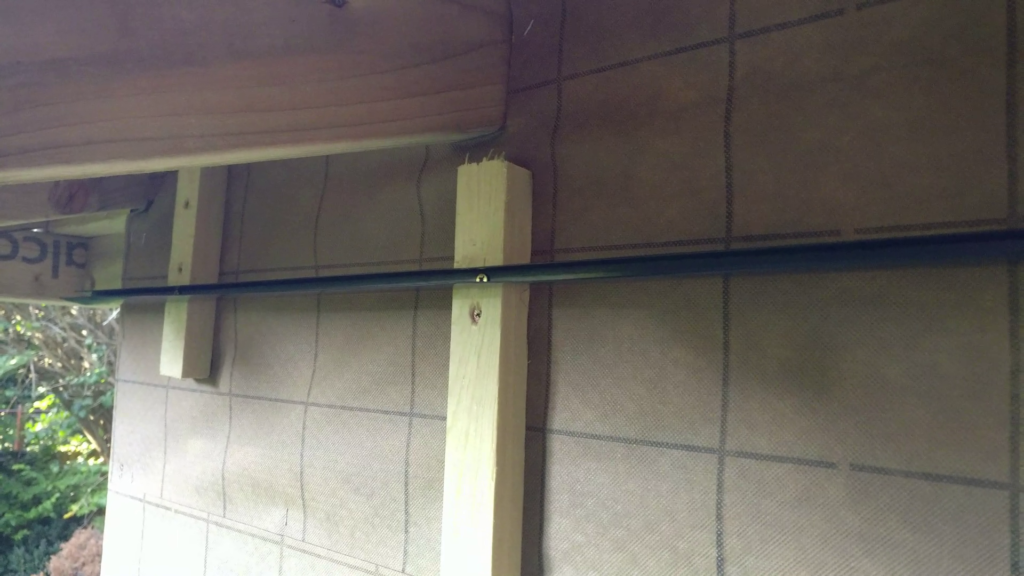
- Marking the Datum Line: Using a framing square pushed flush against the wall battens beneath the eaves, mark a level pencil line on each vertical batten where the bottom edge of the rafter tail meets it.
- Mounting the J-Channel: Screw a uPVC J-trim horizontally along this line using 20mm stainless steel screws. The back flange of the trim fits flush against the wall, creating a clean receiving slot.
- Cutting Soffit Boards: I selected a 9mm thick x 250mm wide black woodgrain PVC soffit board. To avoid tearing or delaminating the decorative laminate skin, always cut uPVC boards using a fine-toothed hacksaw or junior hacksaw, rather than a coarse handsaw or circular saw.
- Fixing the Boards: Slide the rear edge of the soffit board into the J-channel slot—which holds the board in position—and fix the outer edge into the timber rafter tails using 14mm $\times$ 2.5mm stainless steel clout nails.
Safety & Standards Note: Ensure your soffit fixings are kept within 20mm of the outer rafter edge. The bottom return lip of your outer fascia board will clip beneath the soffit, completely hiding your nail heads from view.
Step 4: Installing Heavy-Duty uPVC Fascia Boards
For the main eaves fascia, I selected a 16mm thick load-bearing uPVC profile (K16 series) featuring an integrated bottom lip to support the soffit boards.
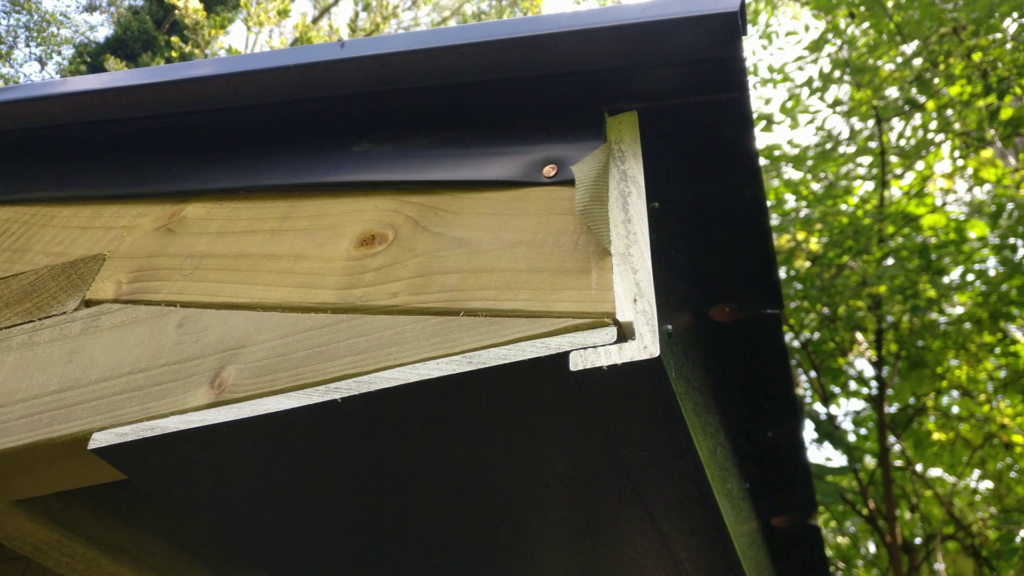
- Marking Fixing Points: Once the fascia is held up against the eaves, rafter positions are hidden. To fix this, measure your rafter positions beforehand and transfer pencil grid lines onto the protective film of the fascia board.
- Pre-Pinning Hardware: Pre-start your fixings along your marked grid lines while working on your workbench. Use 40mm color-matched black poly-top pins (stainless steel ring-shank nails capped with black plastic heads).
- Fixing and Protective Film: Drive the poly-top pins through the fascia into the structural timber rafter tails. Leave the nail heads slightly proud until the protective film is peeled off. This prevents protective plastic from tearing and becoming trapped under the nail heads.
Step 5: How to Build & Trim the Gable Bird Box Return
Completing the bird box requires bridging three different boards: the horizontal eaves fascia, the sloping bargeboard, and the box-end corner piece.
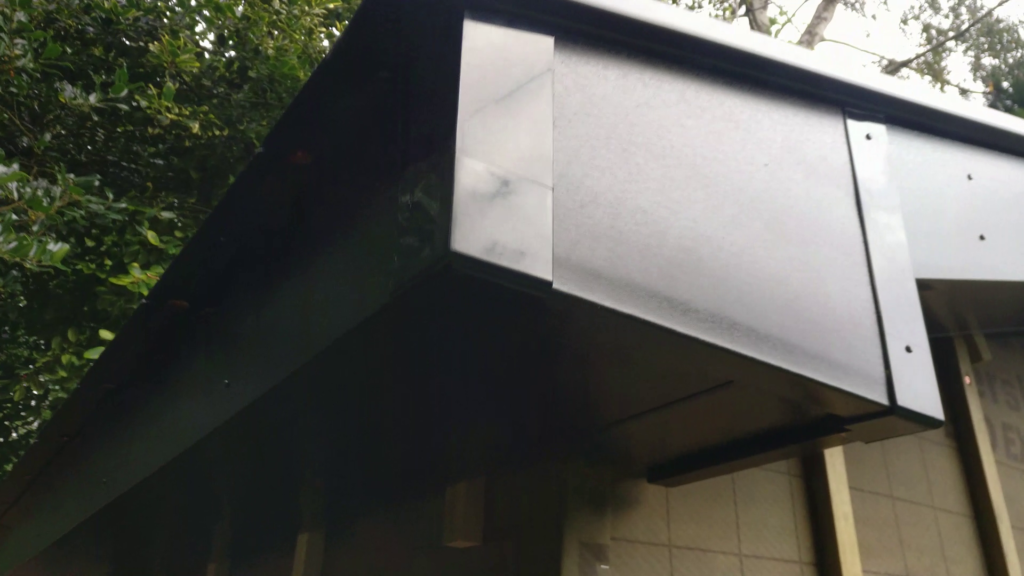
- The Box Board: Cut a section of heavy-duty 400mm uPVC box-end board to match the profile of your timber sub-frame, notching out the bottom corner so it drops cleanly beneath the eaves fascia line.
- Matching Gable Angles: Use an adjustable bevel gauge pressed against the ridge line to capture your roof pitch angle (20° on our Smart Shed). Transfer this angle directly onto your sloping bargeboard fascia before cutting.
- Corner Joiners & Expansion: Fit pre-moulded 90° corner trims and 2-part joint covers over the intersecting uPVC board seams. Secure the joint trims using poly-top pins driven through one side of the joint only.
Watch the Build: How to Fit Soffits and Fascias & Frame a Bird Box

Thermal Movement & Fastener Safety Matrix
Plastic building products undergo substantial linear expansion and contraction through seasonal temperature swings. Applying incorrect fixing techniques will cause uPVC boards to buckle or warp during hot summer months.
| Component | Fastener Type | Movement Requirement | Correct Method |
| Soffit J-Channel | 20mm Stainless Screws | High Expansion | Fix through pre-punched oval slots; do not over-tighten screws flush. |
| Soffit Board | 14mm Ring-Clout Nails | Medium Expansion | Pin along outer edge; allow 5mm clearance gaps inside J-channels. |
| 16mm Fascia Board | 40mm Poly-Top Pins | High Expansion | Drive two pins vertically per rafter tail; leave 6mm expansion gaps at board butt joints. |
| Bird Box Joiners | Black Poly-Top Pins | Critical Joint | Pin on ONE side of joint trim only. Pinning both sides locks the joint and causes thermal cracking. |
Technical Specifications Reference
For builders sourcing materials for their own DIY workshop or home office project, here are the exact specifications used in this how to fit soffits and fascia guide:
| Material / Hardware | Specification / Dimension | Function / Feature |
| Wall Battens | 25 x 38 C16 Treated Timber | Creates a 25mm ventilated wall cavity over the breathable membrane. |
| Soffit Board | 9mm x 250mm Black Woodgrain uPVC | Vapour-resistant eaves enclosure with fine timber effect skin. |
| Fascia Board | 16mm x 150mm / 400mm K16 uPVC | Heavy-duty structural profile with built-in soffit return lip. |
| Joint Accessories | 2-Part H-Trim & Corner Box Covers | Conceals cut edges and provides thermal movement gaps at seams. |
| Primary Fixings | 40mm Stainless Ring-Shank Poly-Pins | Marine-grade stainless steel nails with UV-stable black plastic heads. |
Q: Why do you need a timber sub-fascia behind uPVC boards?
A: Thin 9mm replacement boards (capping boards) require a solid timber backing board to prevent sag. While thick 16mm load-bearing uPVC fascias can span directly across rafter tails, adding a 4 x 2 sub-fascia framing block at the box-end corners provides a rigid surface to nail box-end returns, bargeboards, and corner trims onto seamlessly.
Q: What is the best saw to use when cutting uPVC fascia and soffit?
A: Always use a fine-toothed hacksaw or junior hacksaw. High-speed power saws, or coarse wood handsaws, generate friction heat that melts the plastic, chips the edges, or rips the decorative woodgrain laminate film away from the uPVC substrate.
Q: How do you prevent roof space condensation when installing soffits?
A: Air must flow continuously into the roof cavity to purge moist air. You can achieve this by installing pre-vented soffit boards (containing continuous micro-mesh slots) or drilling circular holes into solid soffit boards to fit retro-fit soffit disc vents at regular intervals.
The Built By Pete Shed Build Series Videos
Here’s all the other videos in the Ultimate shed building series.
More to Interest You
- Is Plug-In Solar FINALLY Legal in the UK? (The August 27 Rules Explained)
- The Easiest DIY Solar Setup Ever? (EcoFlow PowerStream Microinverter Unboxing)
- What Home Electrical Work Can You Do Yourself: A Guide to Your Home’s Electrical Supply
- Professional Junction Boxes: Building with DIN Rail Terminal Blocks (UK Guide)
- How to Wire a Wall Socket Correctly (Step by Step Guide)
Subscribe Now!
If you found this how to fit soffits and fascias interesting and are ready to stop guessing and start troubleshooting your own tech plus smart DIY, head over to the Built By Pete YouTube channel! We’ve got hundreds of other DIY projects and smart home tutorials. Click here to subscribe to the BuiltByPete youtube channel and hit the notification bell so you never miss out on the tips, tricks, and step-by-step guides that will simplify your tech life.